
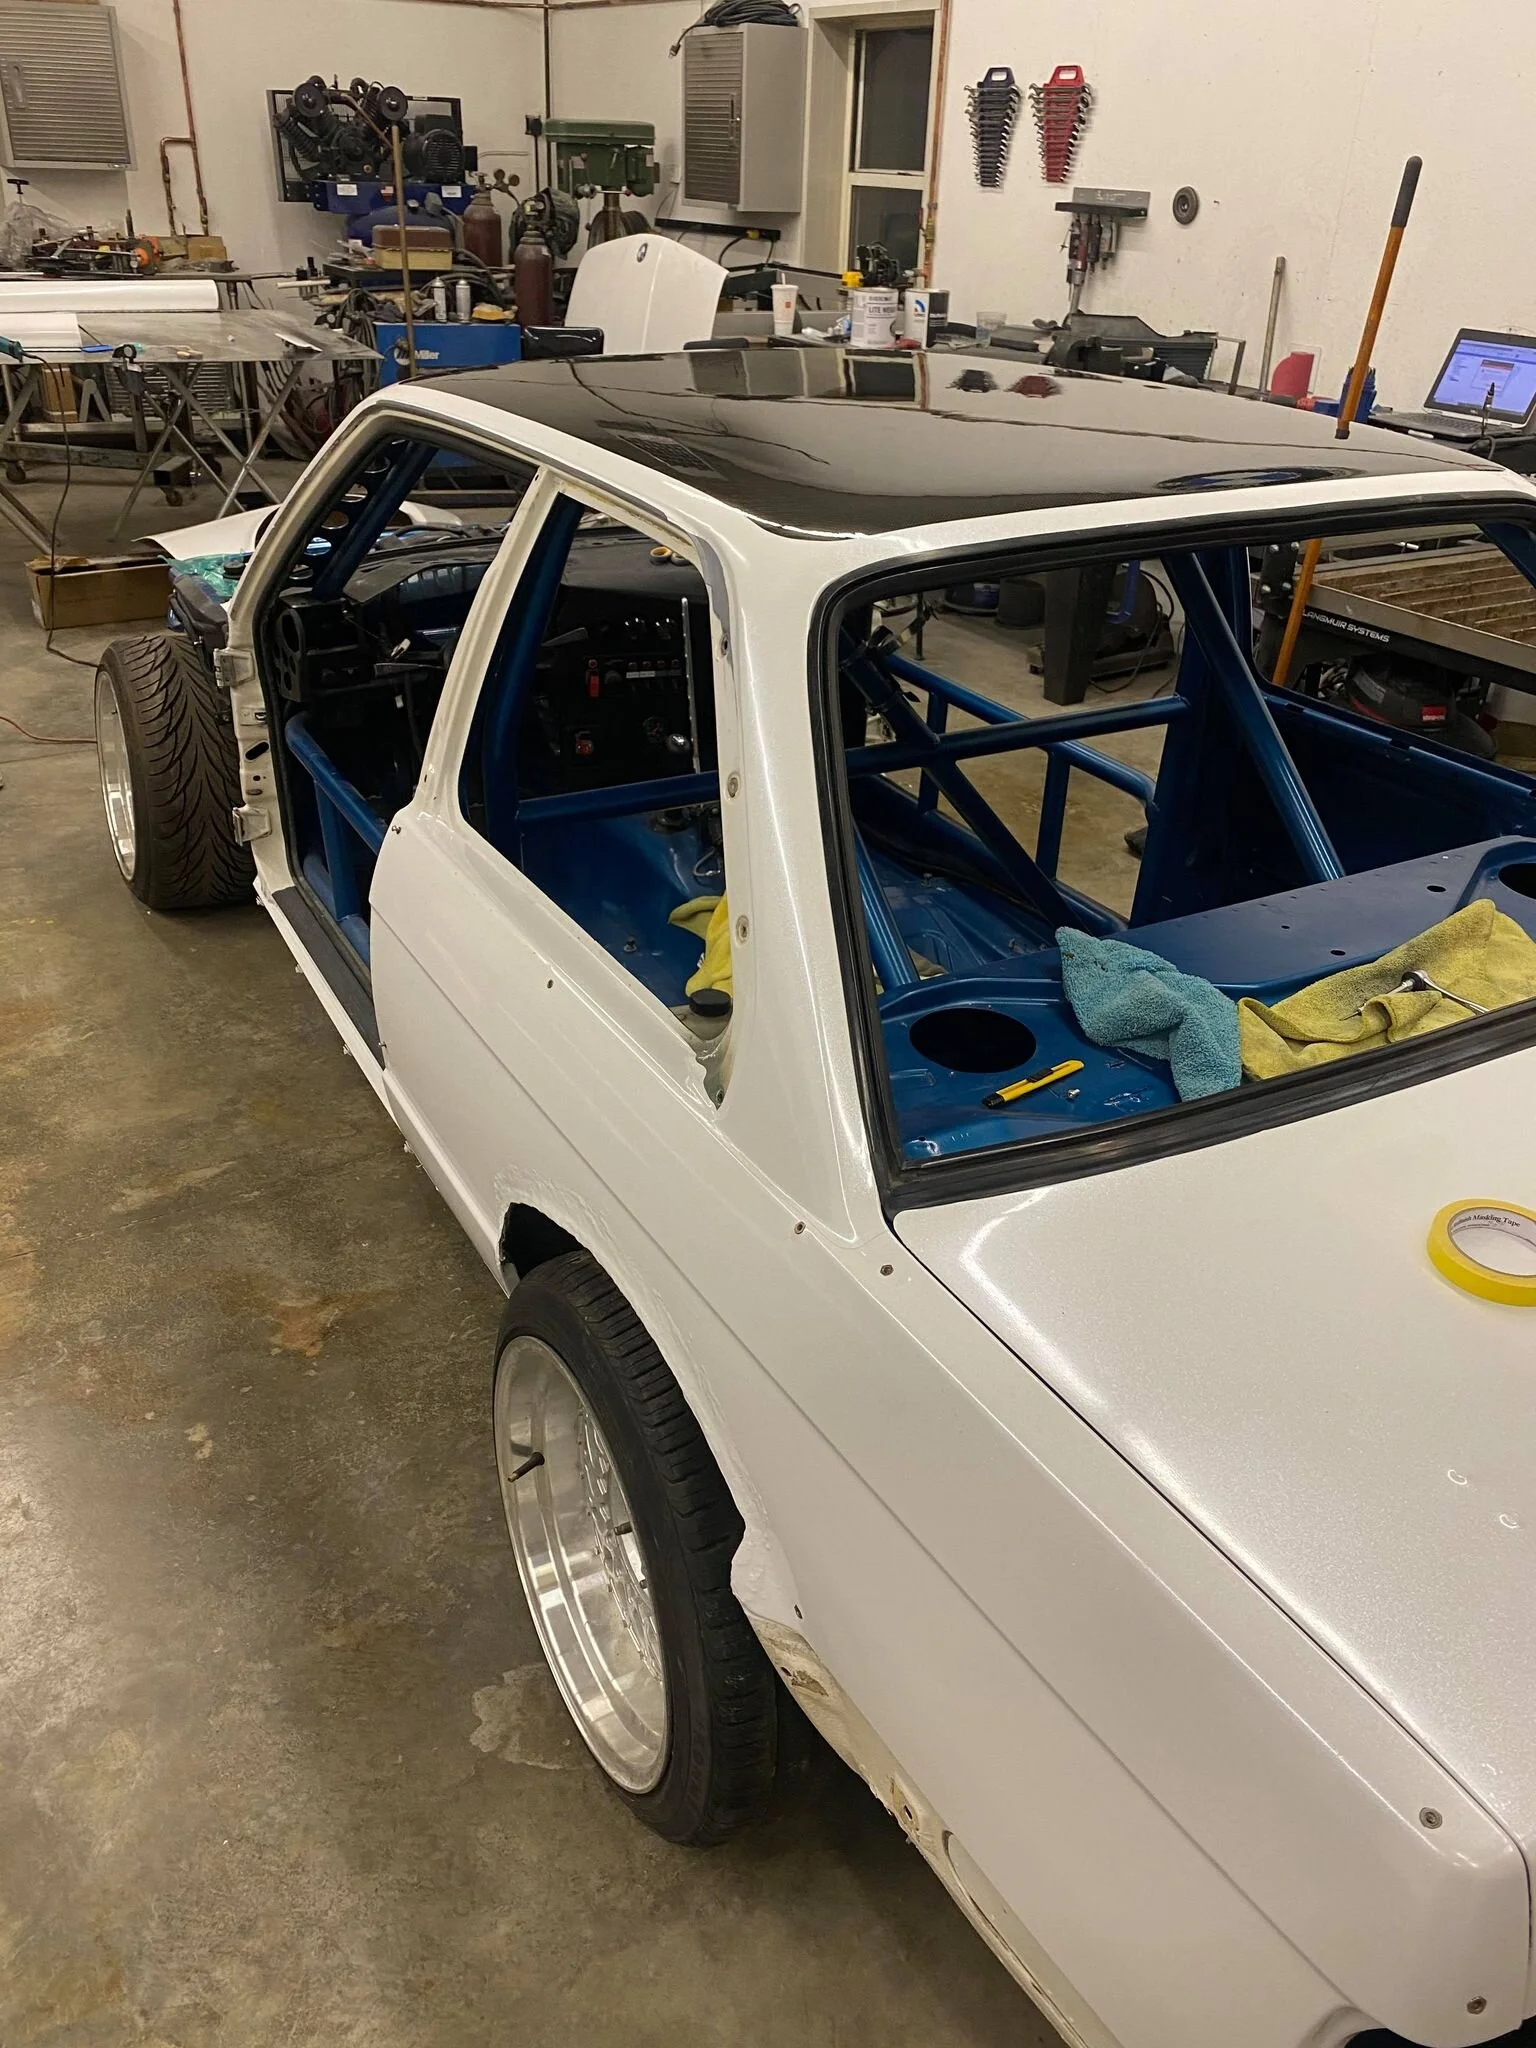
E30 CARBON FIBER ROOF SKIN
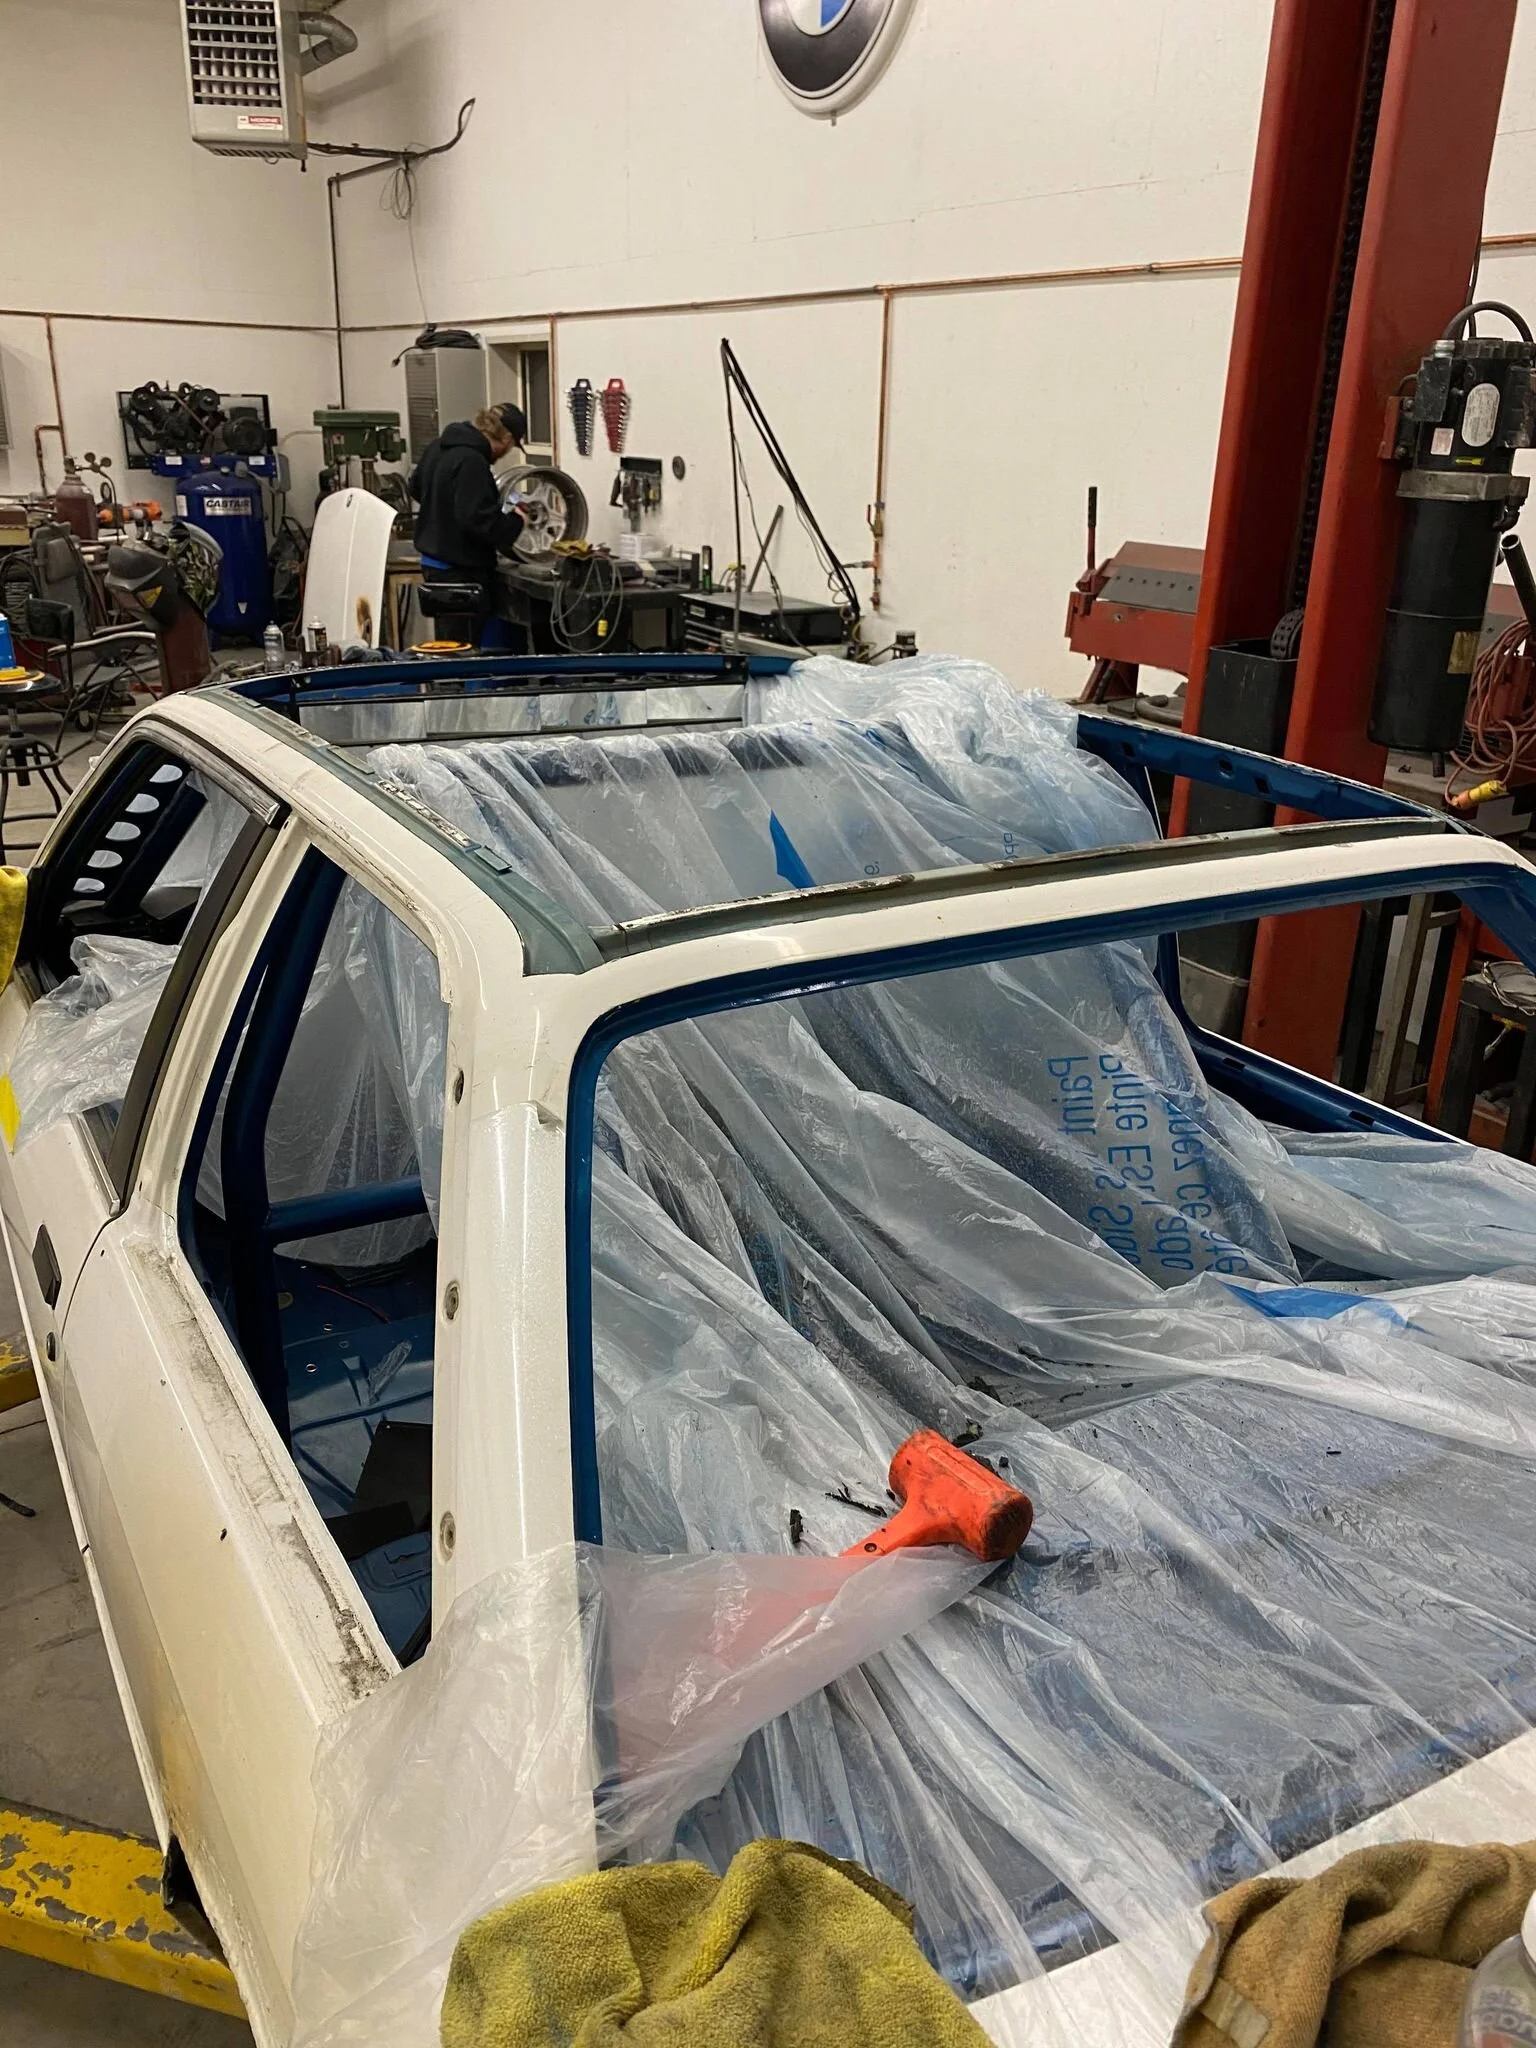
Like mine, most E30’s came from the factory with the sunroof rather than a slick top roof skin. Years ago, when the roll cage was added to the car, the sunroof frame was removed to allow the main hoop to fit as tight to the chassis as possible. The sun roof panel was retrofitted back by building brackets off the roll cage, but whenever driving in the rain the sunroof would leak water into the car.
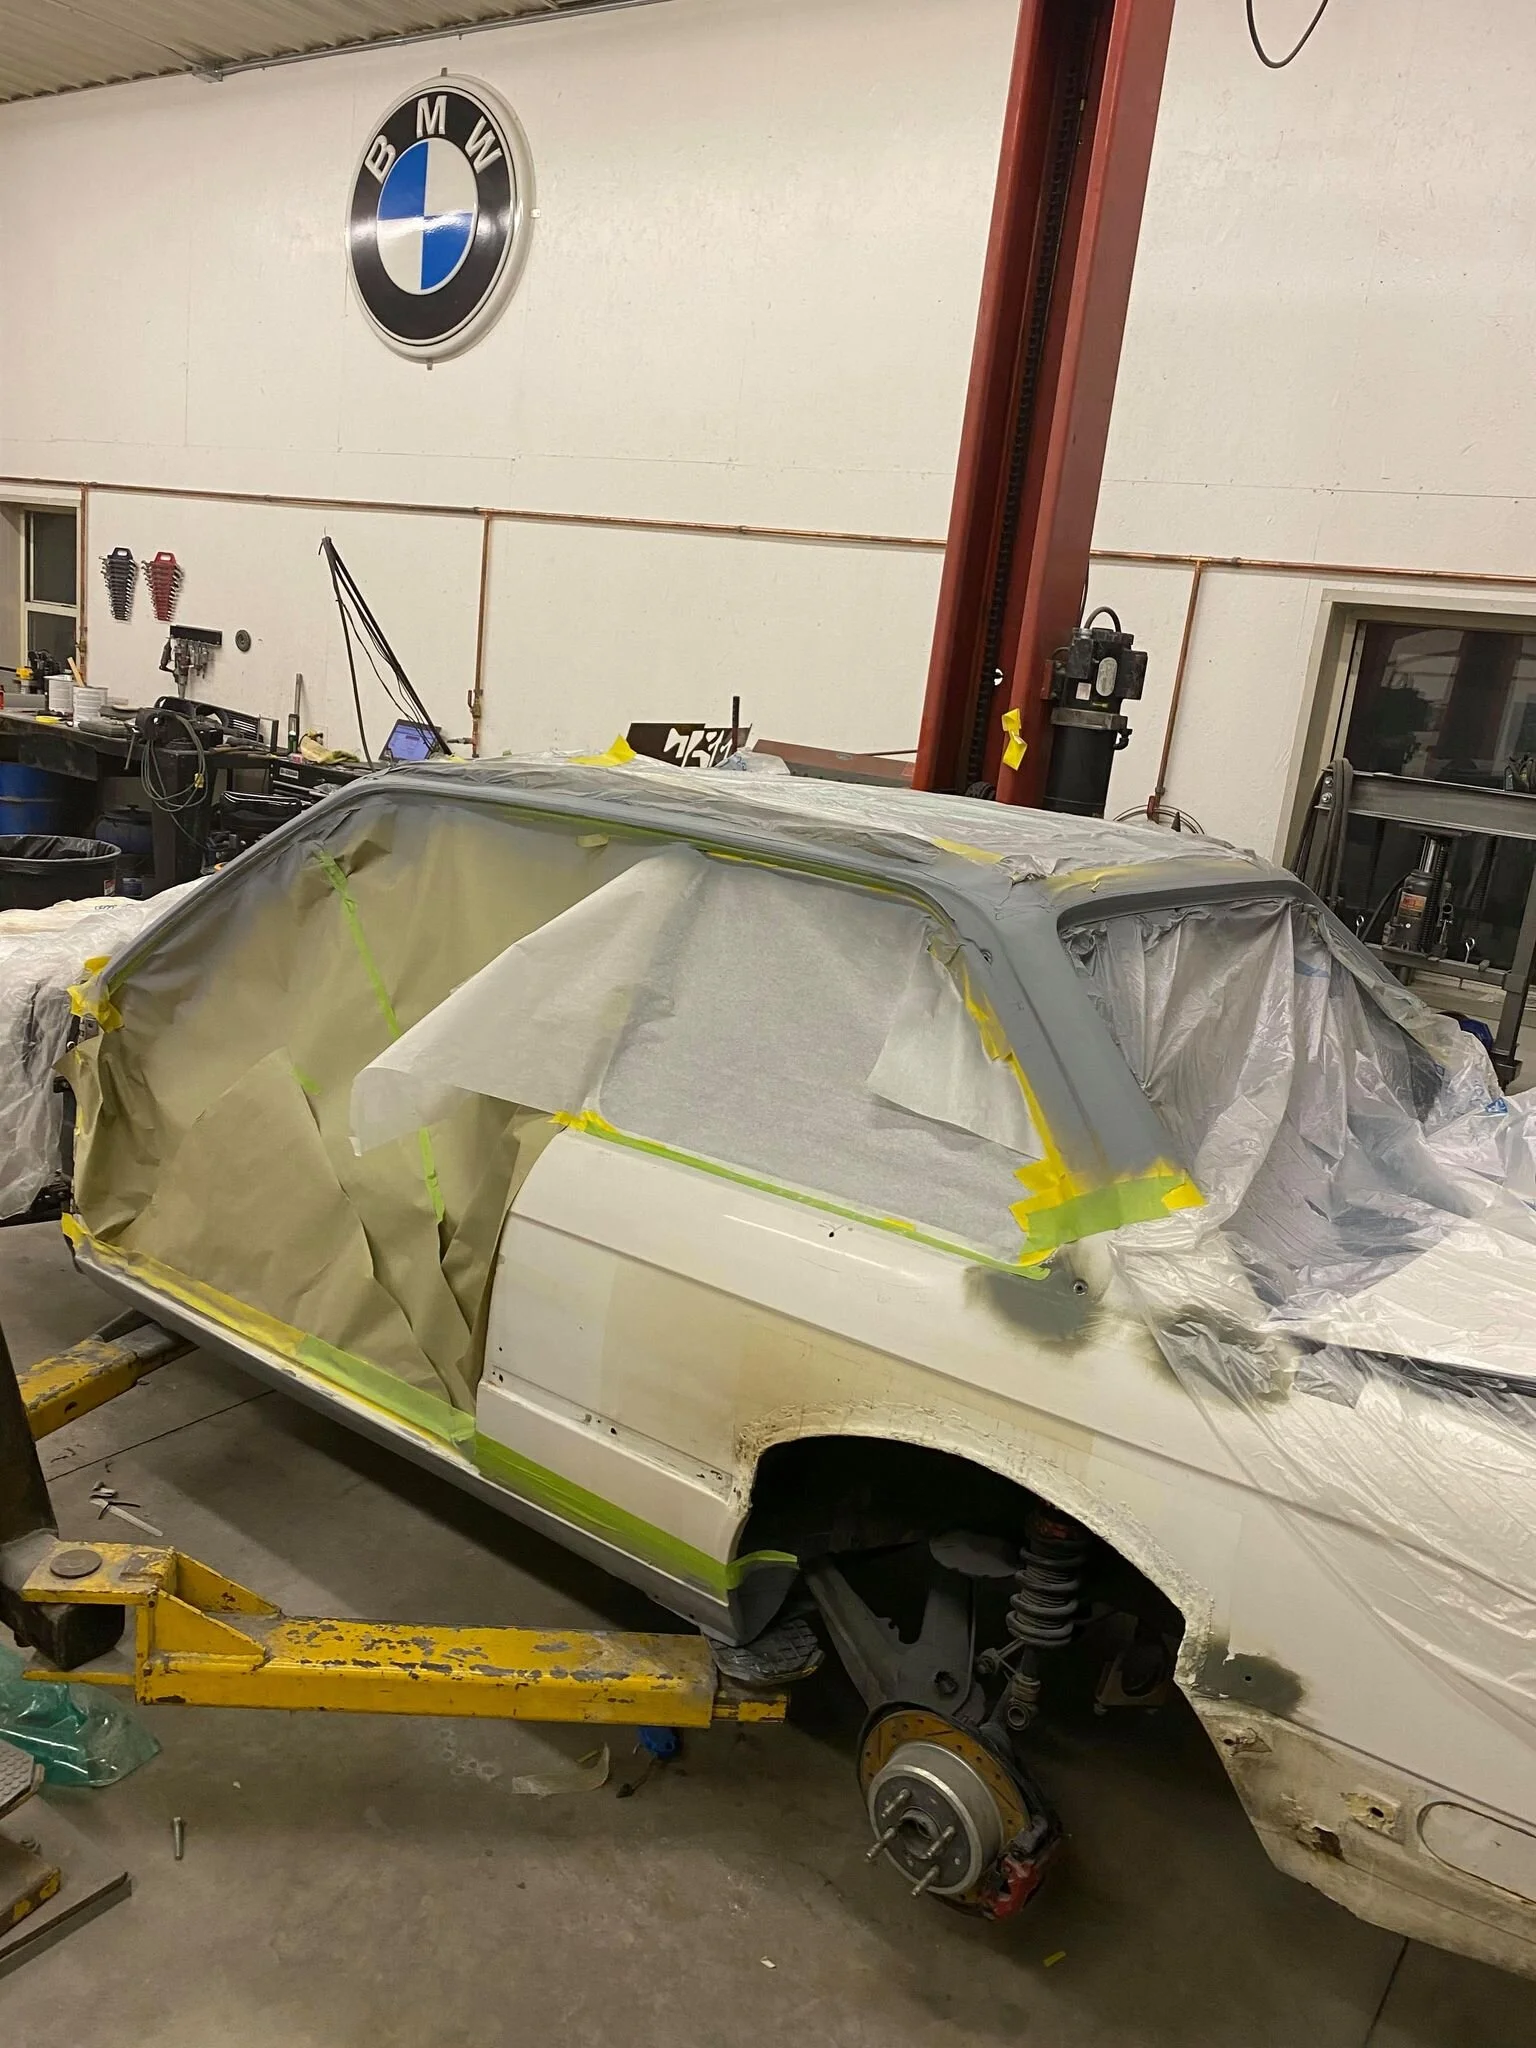
After getting rained on too many times, the decision to do a slick top conversion was made. In 2021, a slick top roof skin is now a NLA item from the dealership and finding a used roof skin in good condition is almost impossible. I knew shaving the original sunroof hole was not the right solution, which helped me make the decision to experiment with more composites and make my own carbon fiber roof skin. Incase things didn’t turn out, a donor roof skin was cut off a wrecked car that has been sitting in the weeds behind the shop.


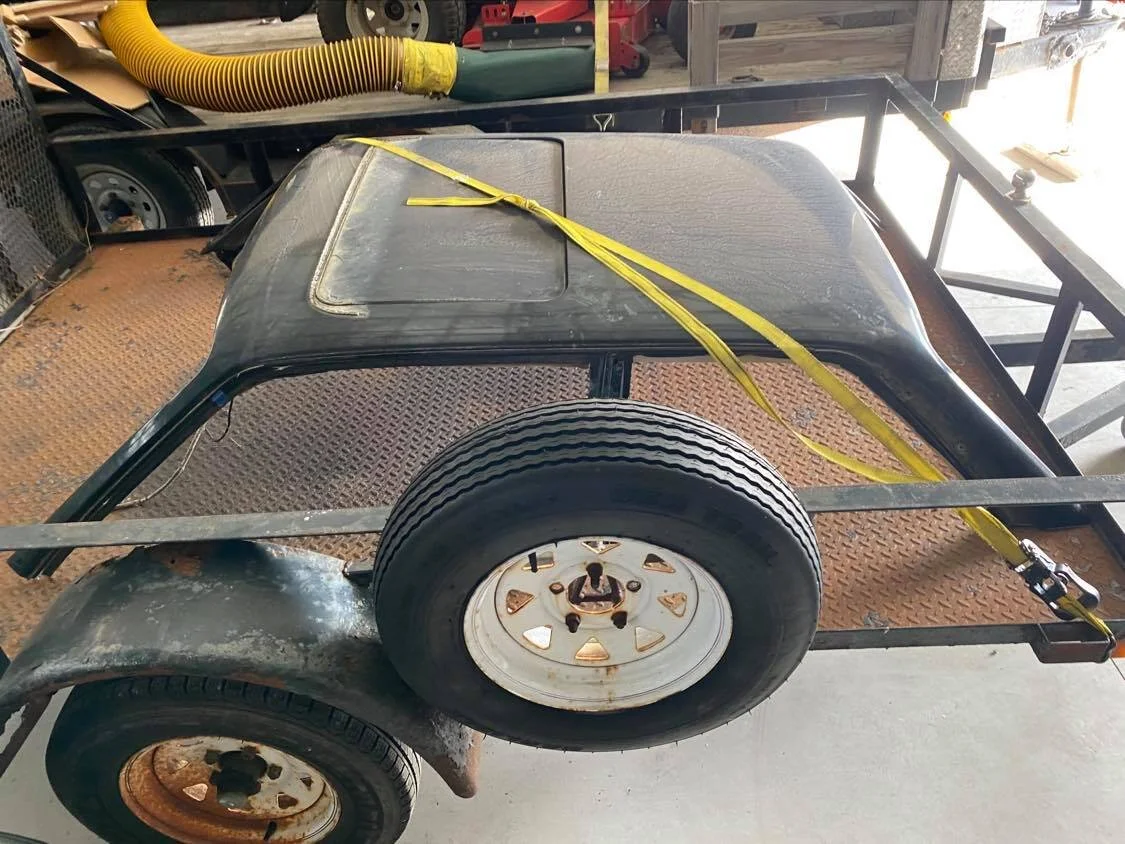
The donor car also had a sun roof, but after removing the paint, tack welding the sun roof panel in place, and a few coats of Body Filler and High Build Primer, the roof skin now resembles a slick top roof skin. I would never suggest this method of removing the sunroof panel, but it works amazing to create composite skin.
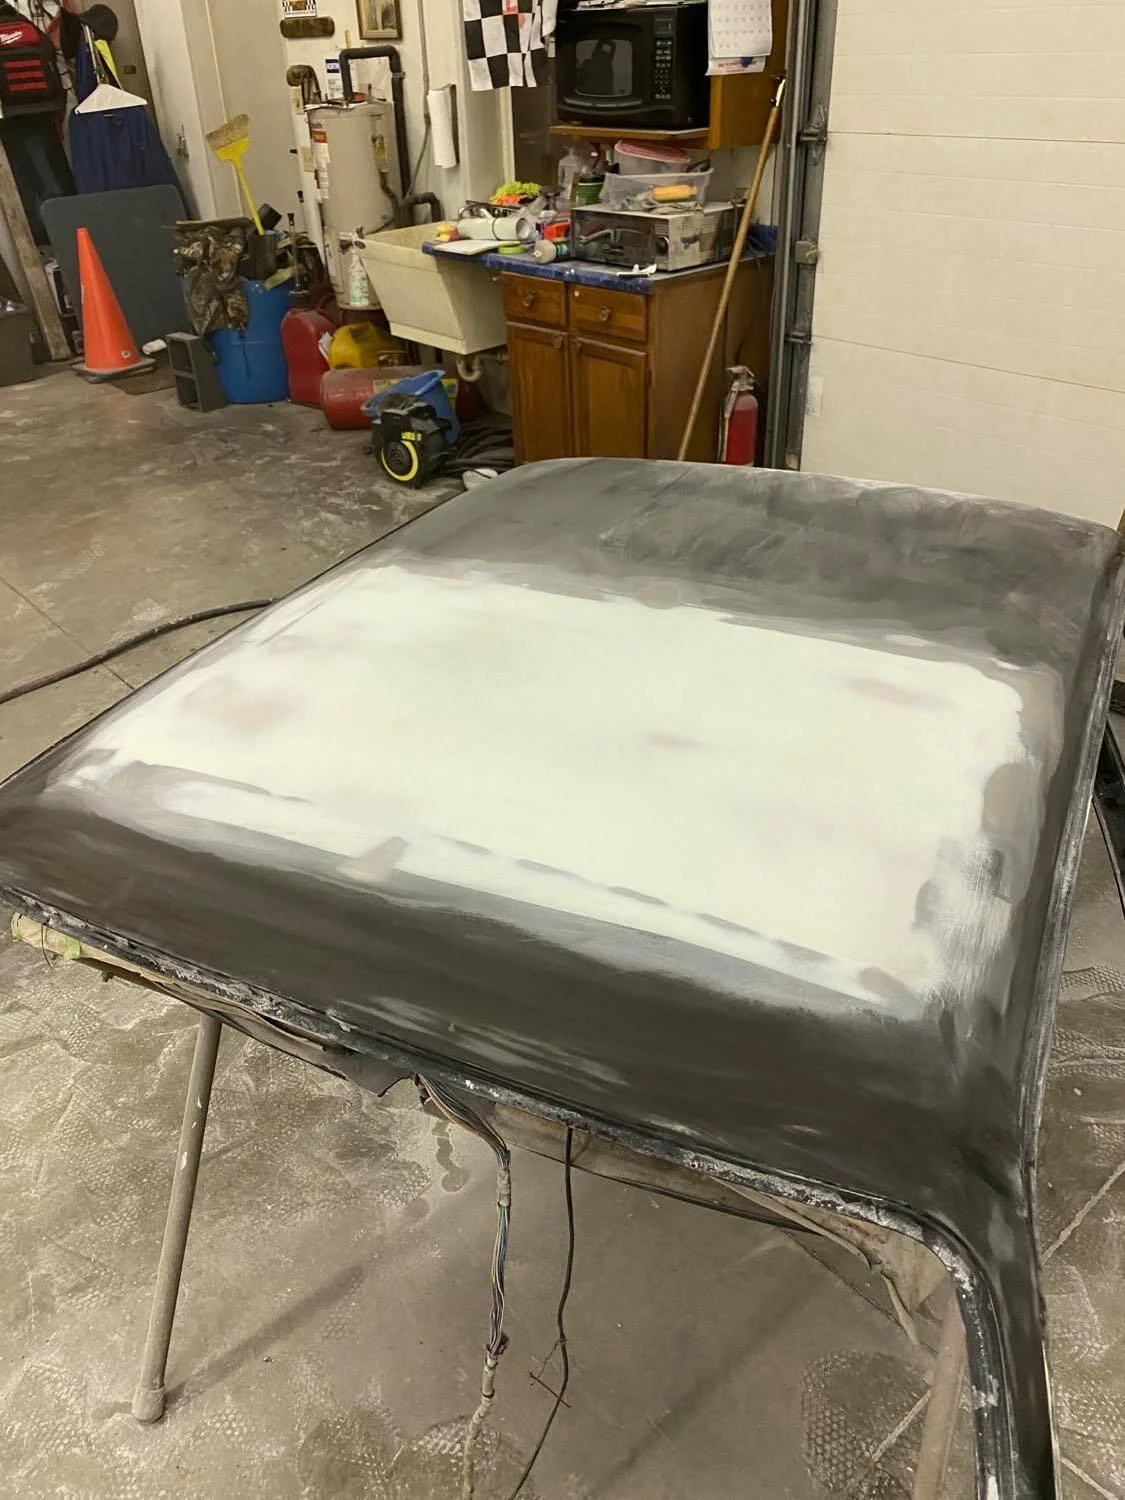


Once the high build primer was cured, everything was wet sanded with 400 grit to remove any texture and imperfections. After sanding, the roof skin was thoroughly cleaned with Wax and Grease Remover, and back taped with masking tape to help control the resin when applied.
I plan on only making one of these roof skins, therefore, to save the costs of making a mold, I used the roof skin as a one time use mold. Since the roof skin needed to be bonded to the part of the original roof skin, I did not need to account for any lost thickness with this method. Too help the carbon panel release from the donor roof mold, three layers of Partall Paste #2 were applied and buffed off, followed by three light coats of Partall Paste #10. At this point, the panel was officially ready to be laid up.


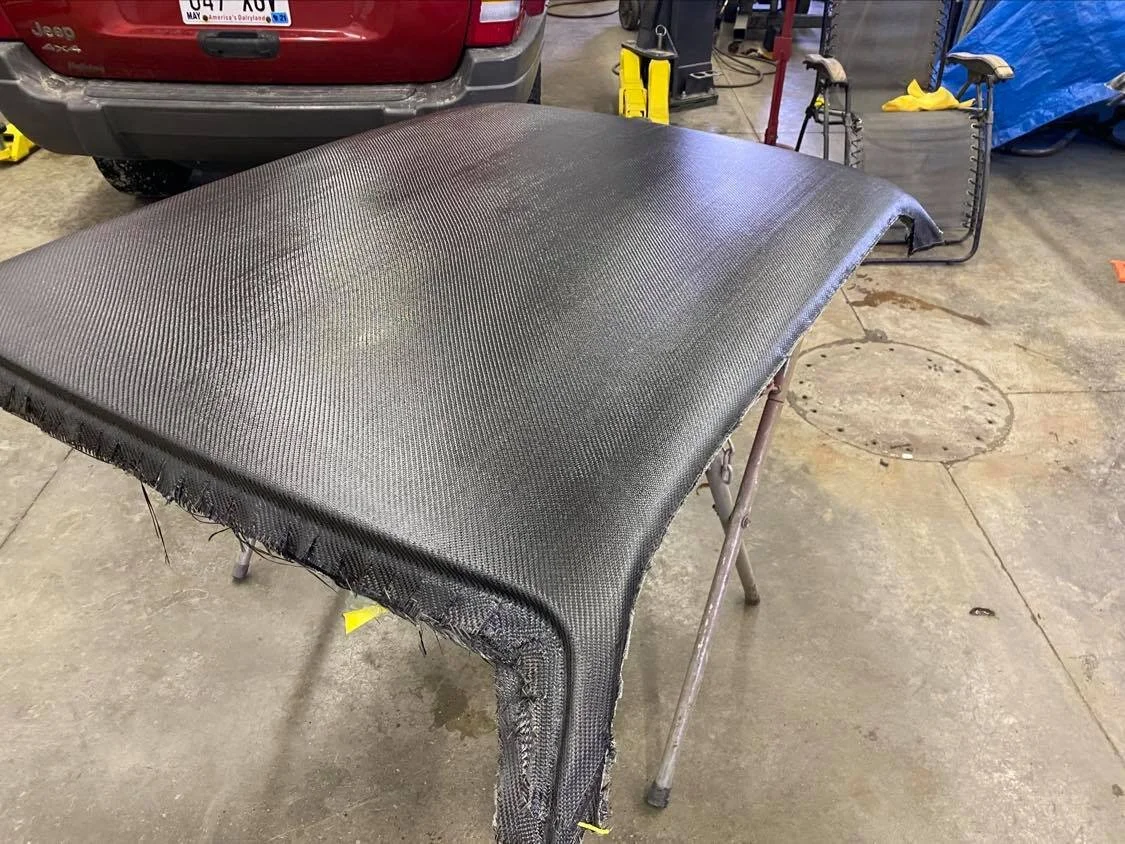
I used a method called a wet lay, where layers of resin and carbon fiber are added consecutively until you have reached you desired amount of layers. Wet laying carbon fiber may not be the most effective process, but is the best method for the circumstances, as it would have been impossible to vacuum bag and infuse this part without making a flanged mold.
For this job, I used a Slow Curing Resin and three layers of 3K 2x2 Twill Weave with one layer of 12K 2x2 Twill Weave in the center. The 12K layer will provide a significant amount of structure and rigidity to the roof skin, which will be handy as I don’t plan on having a center support beam within the roof skin. Without the extra structure or a center support beam, the roof may deform at high speeds.
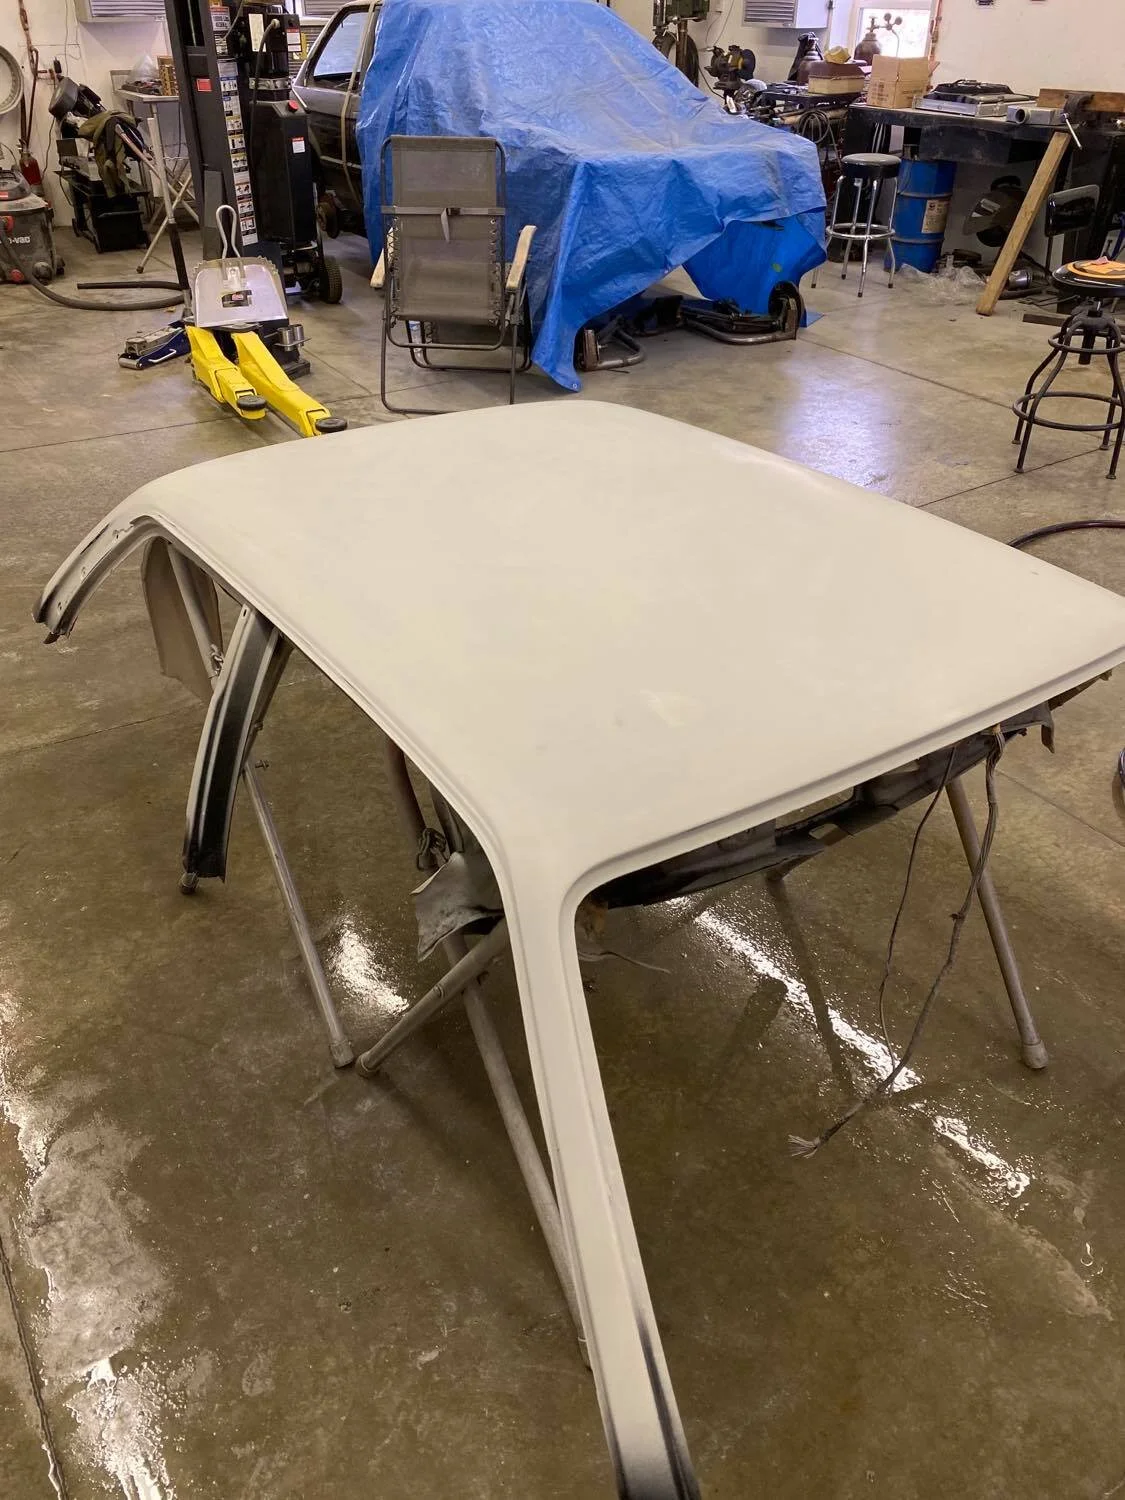
Once all of the layers are complete, everything was left to cure for 24-48 hours depending on the conditions. After 24- 48 hours the skin can be removed, which often required finesse and patience to do so without causing any damage. The bottom side have a very smooth surface, but the top skin may have a slight texture to it.


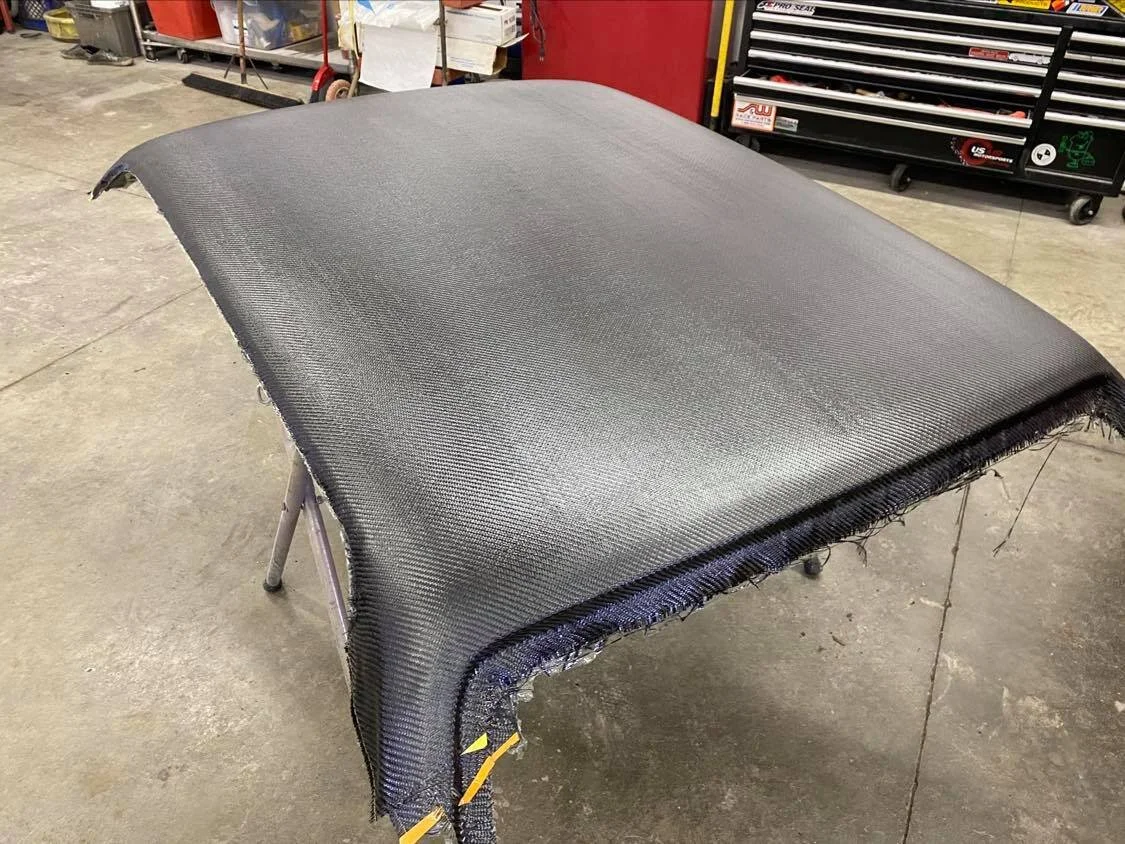
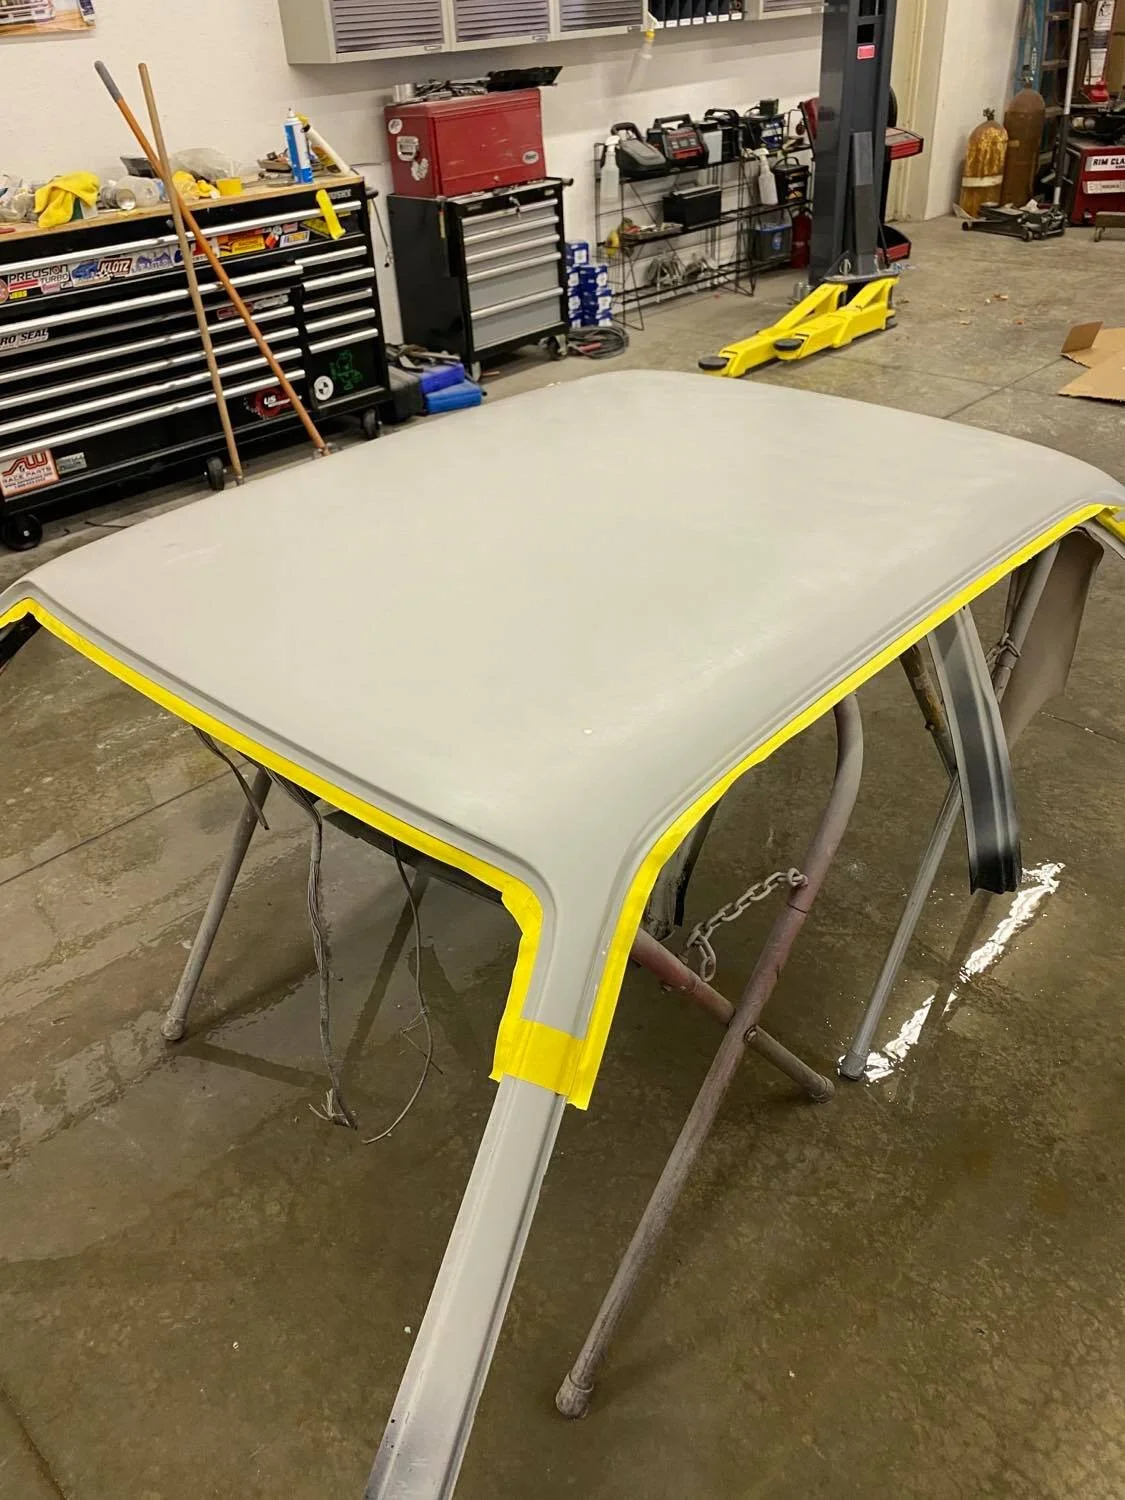
To correct the top surface, I lightly sanded the top surface and applied a few coats of resin. For this, a Faster Curing Resin was used to speed up the process. Once cured, the surface is sanded and prepared for clear coat. Clear coat was added to the surface to provide a UV protection from the sun. Without clear coat, the piece would began to yellow over time. Once clear coated, the roof skin was complete.

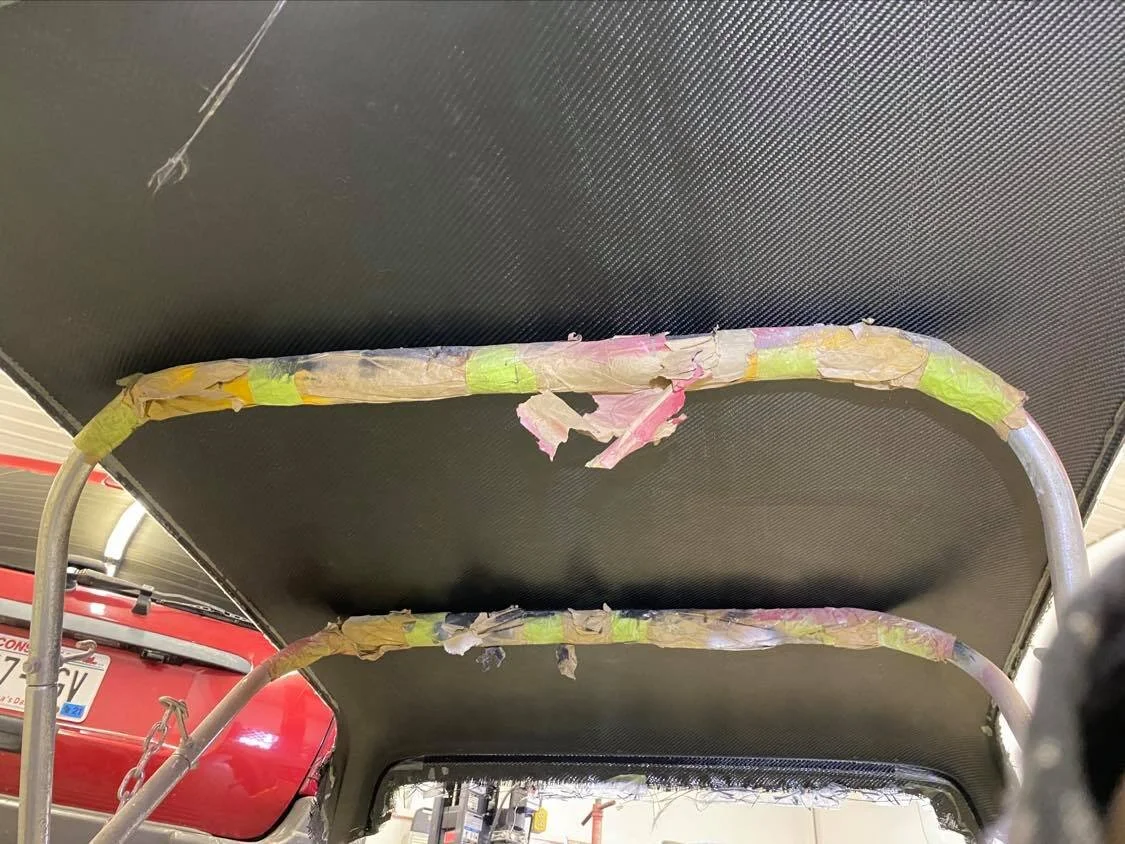
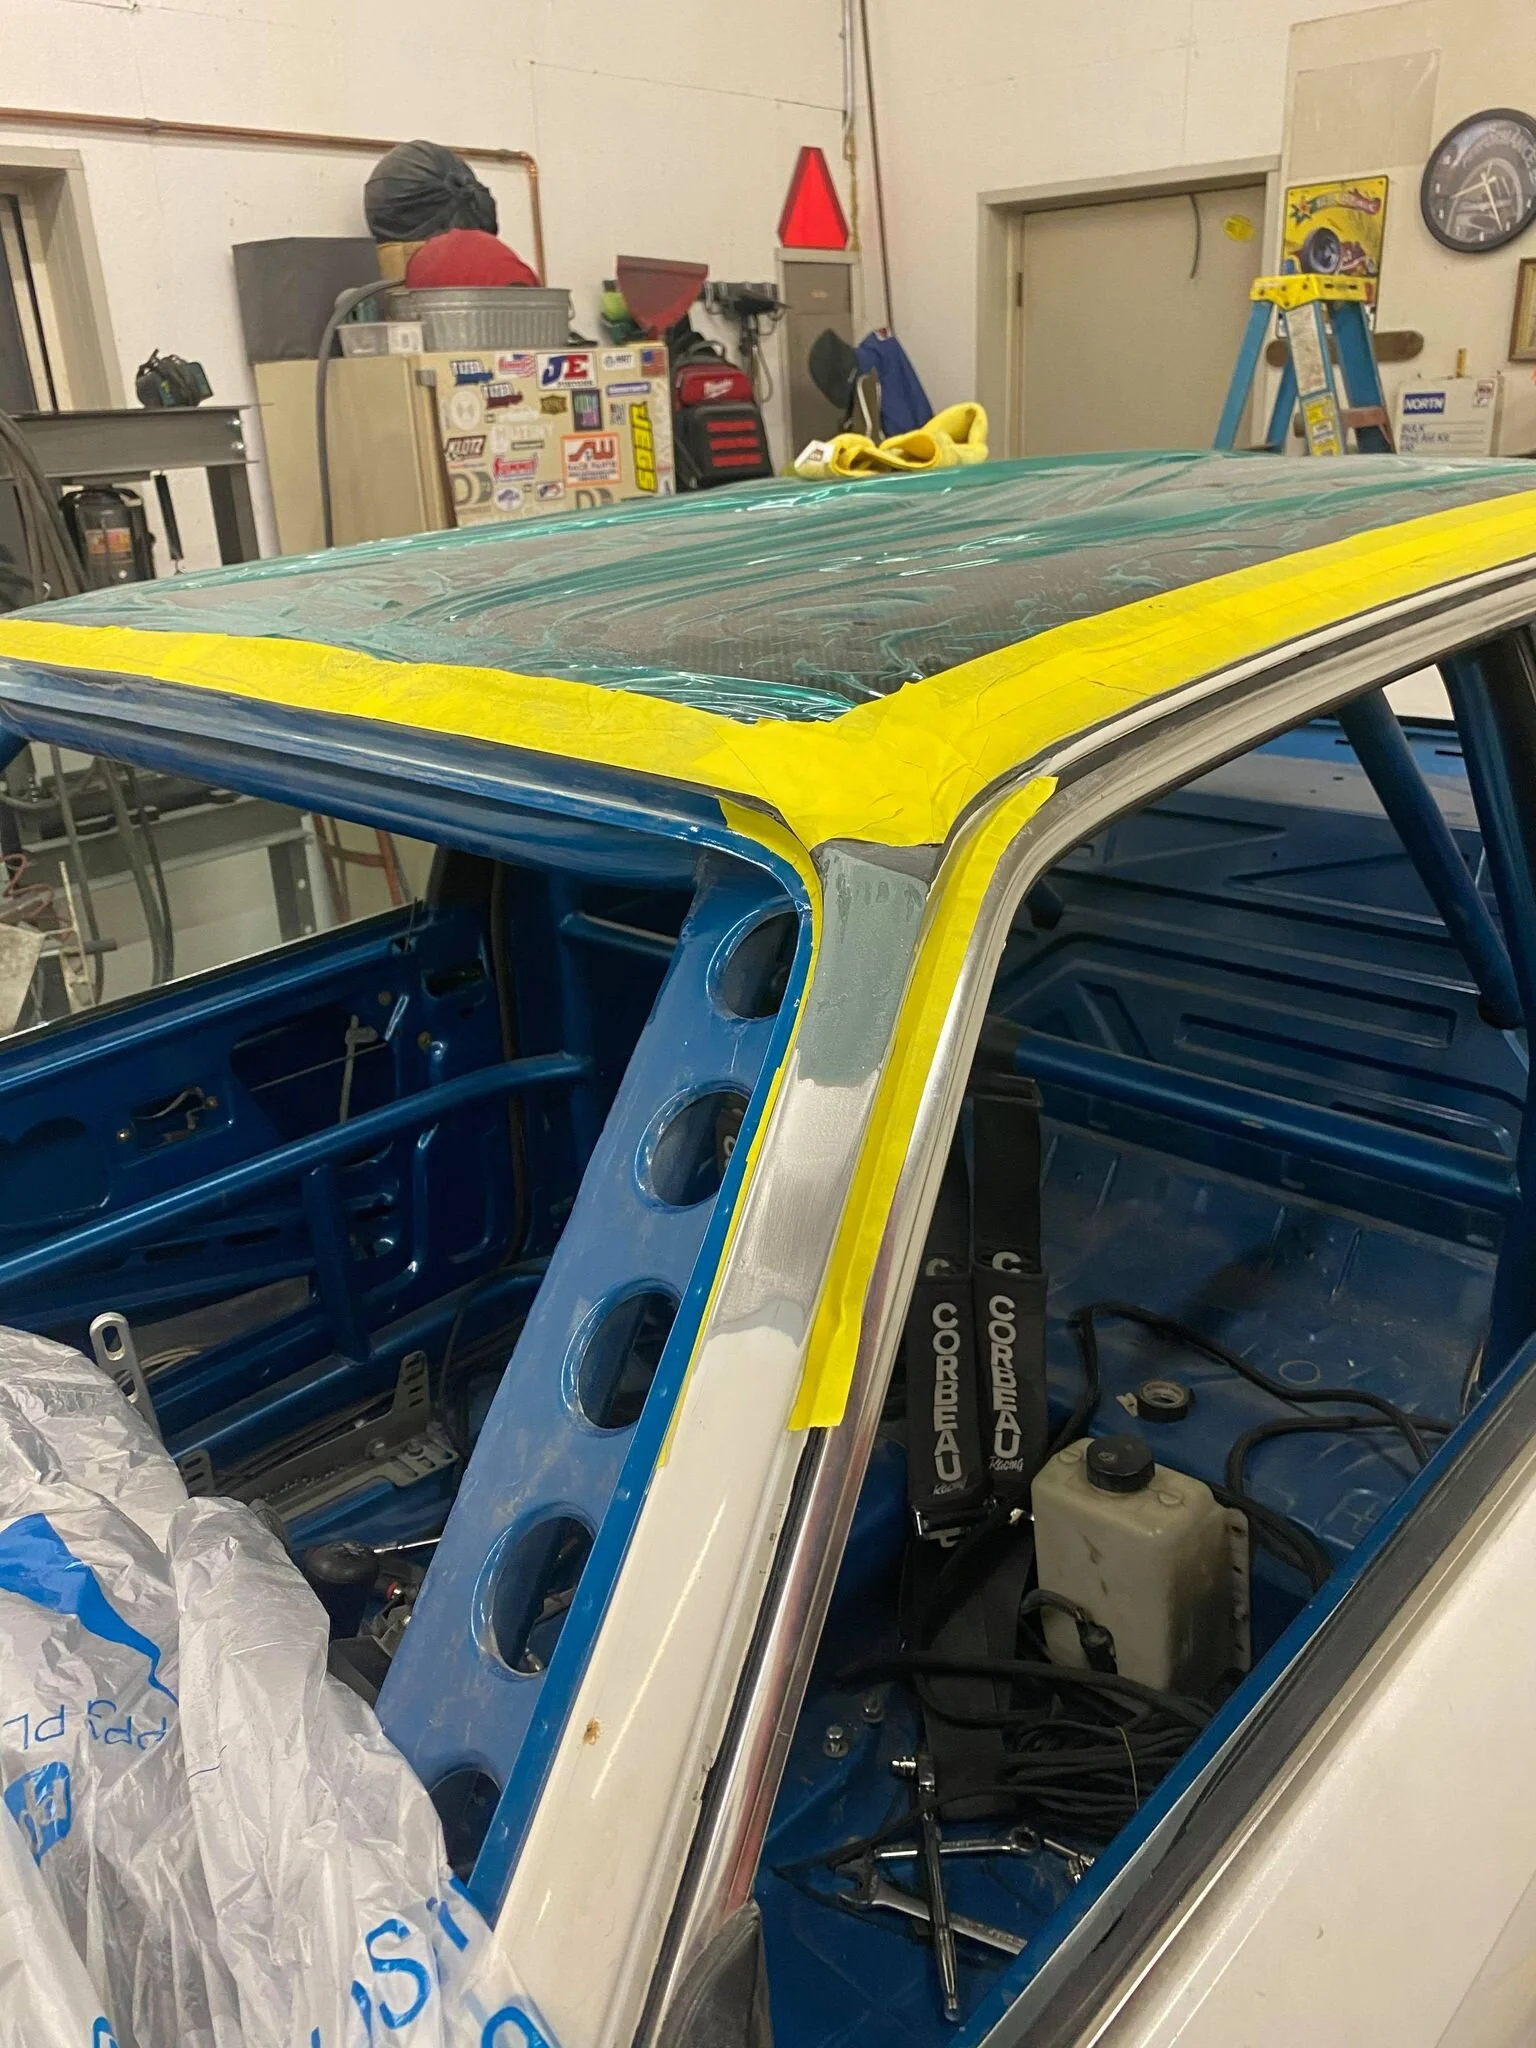
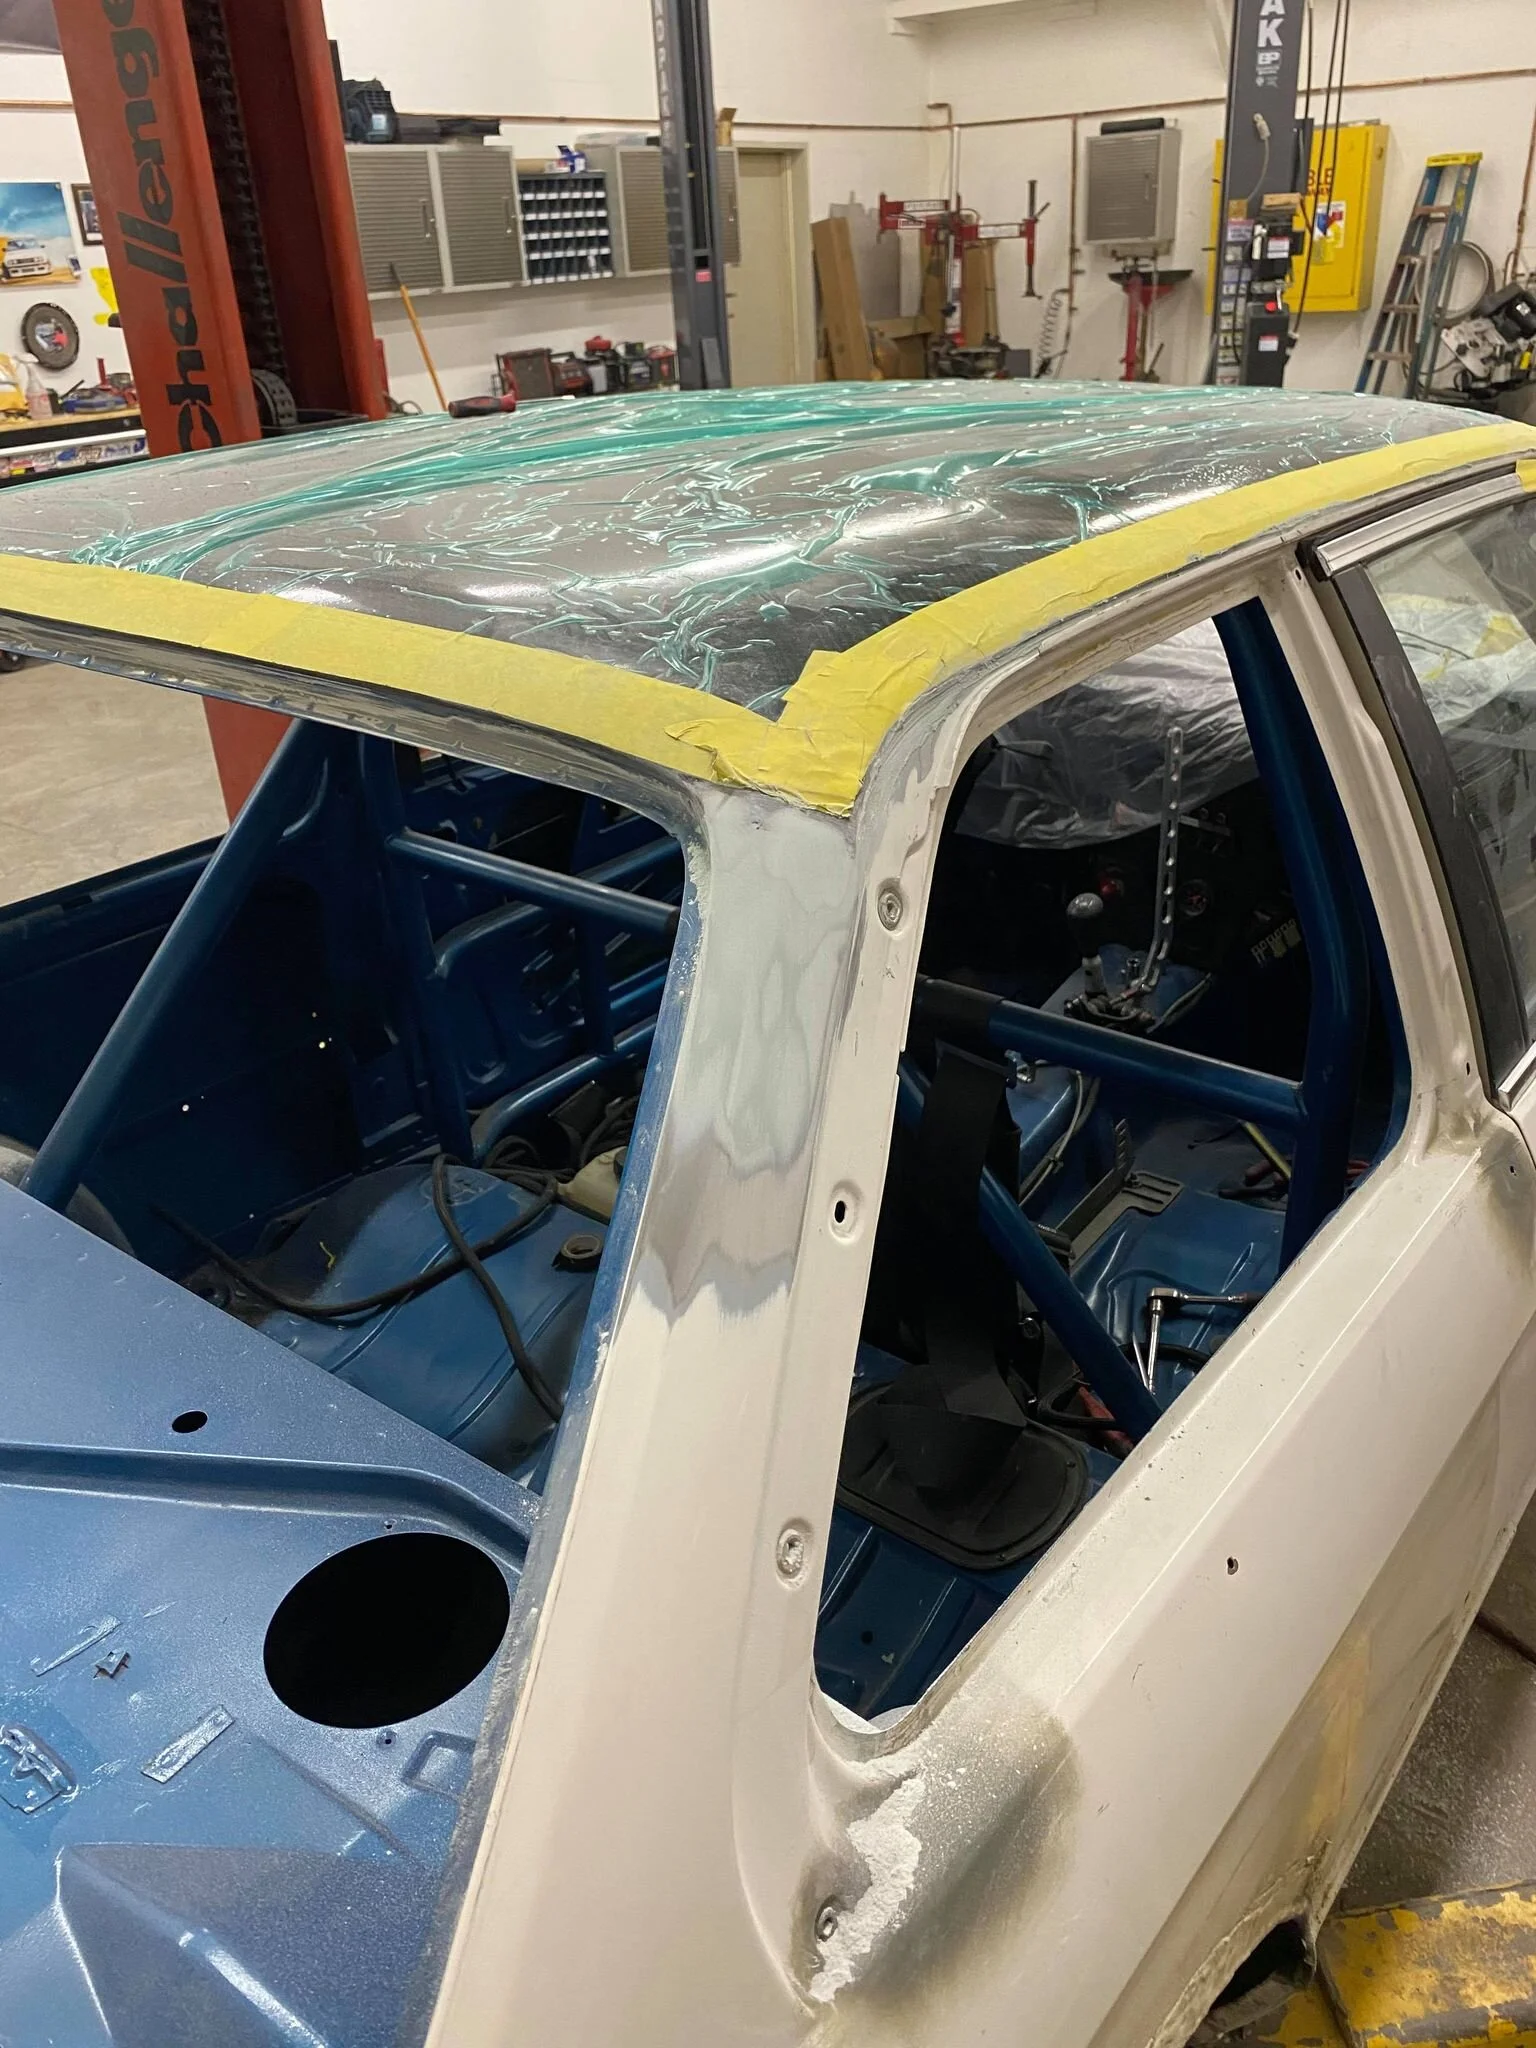
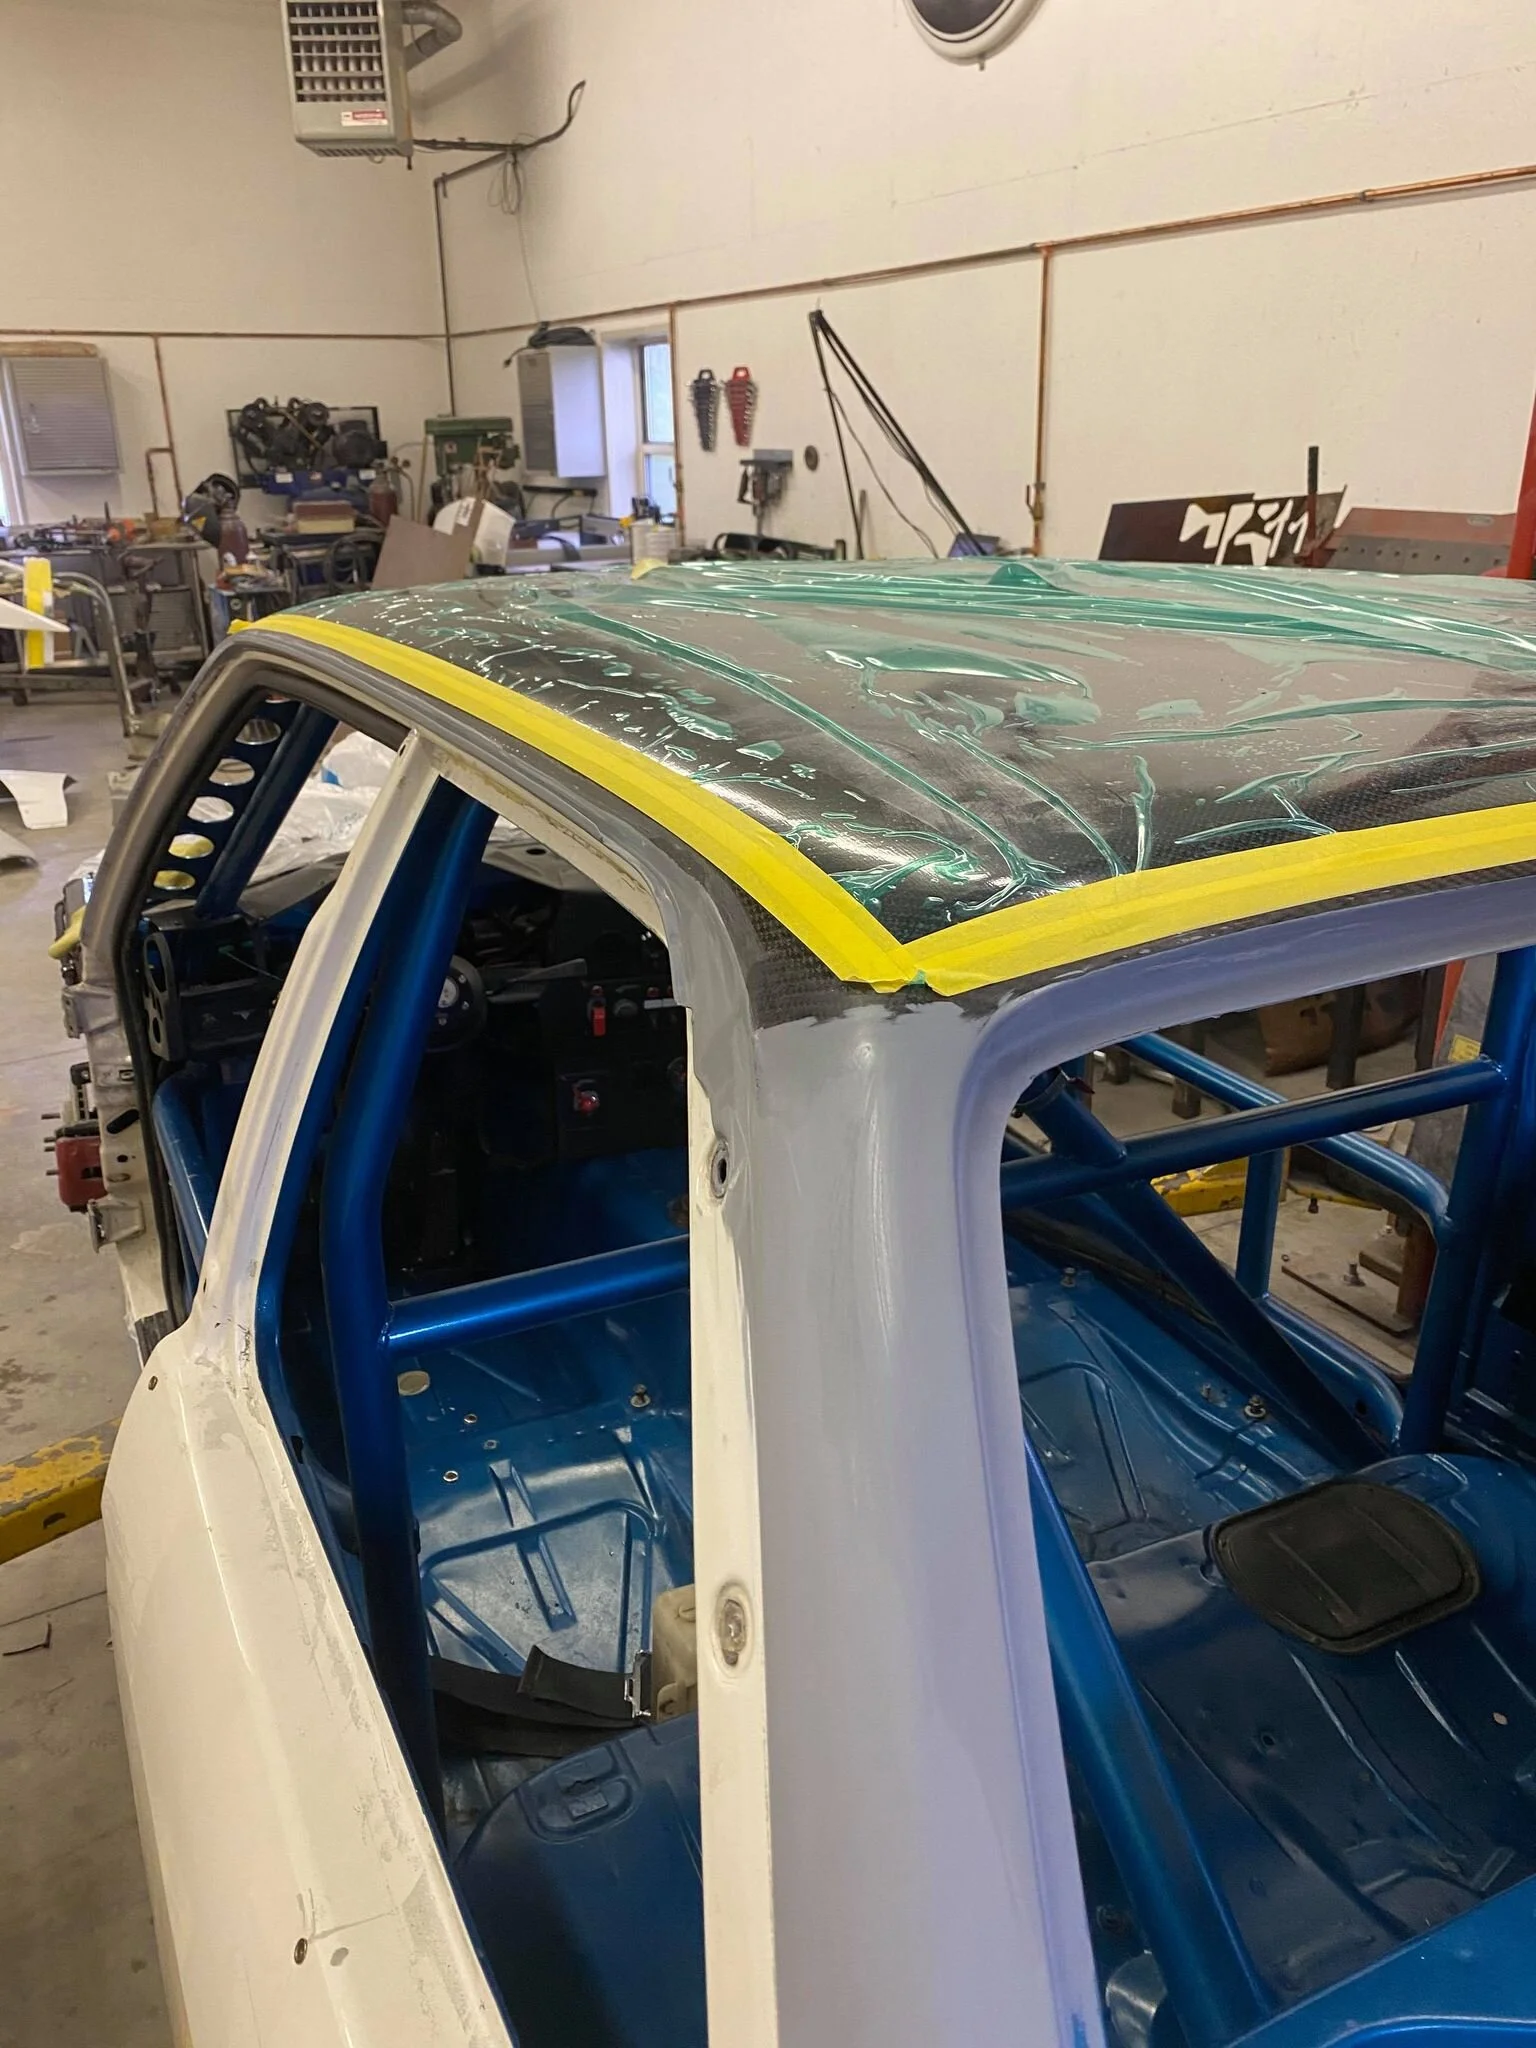
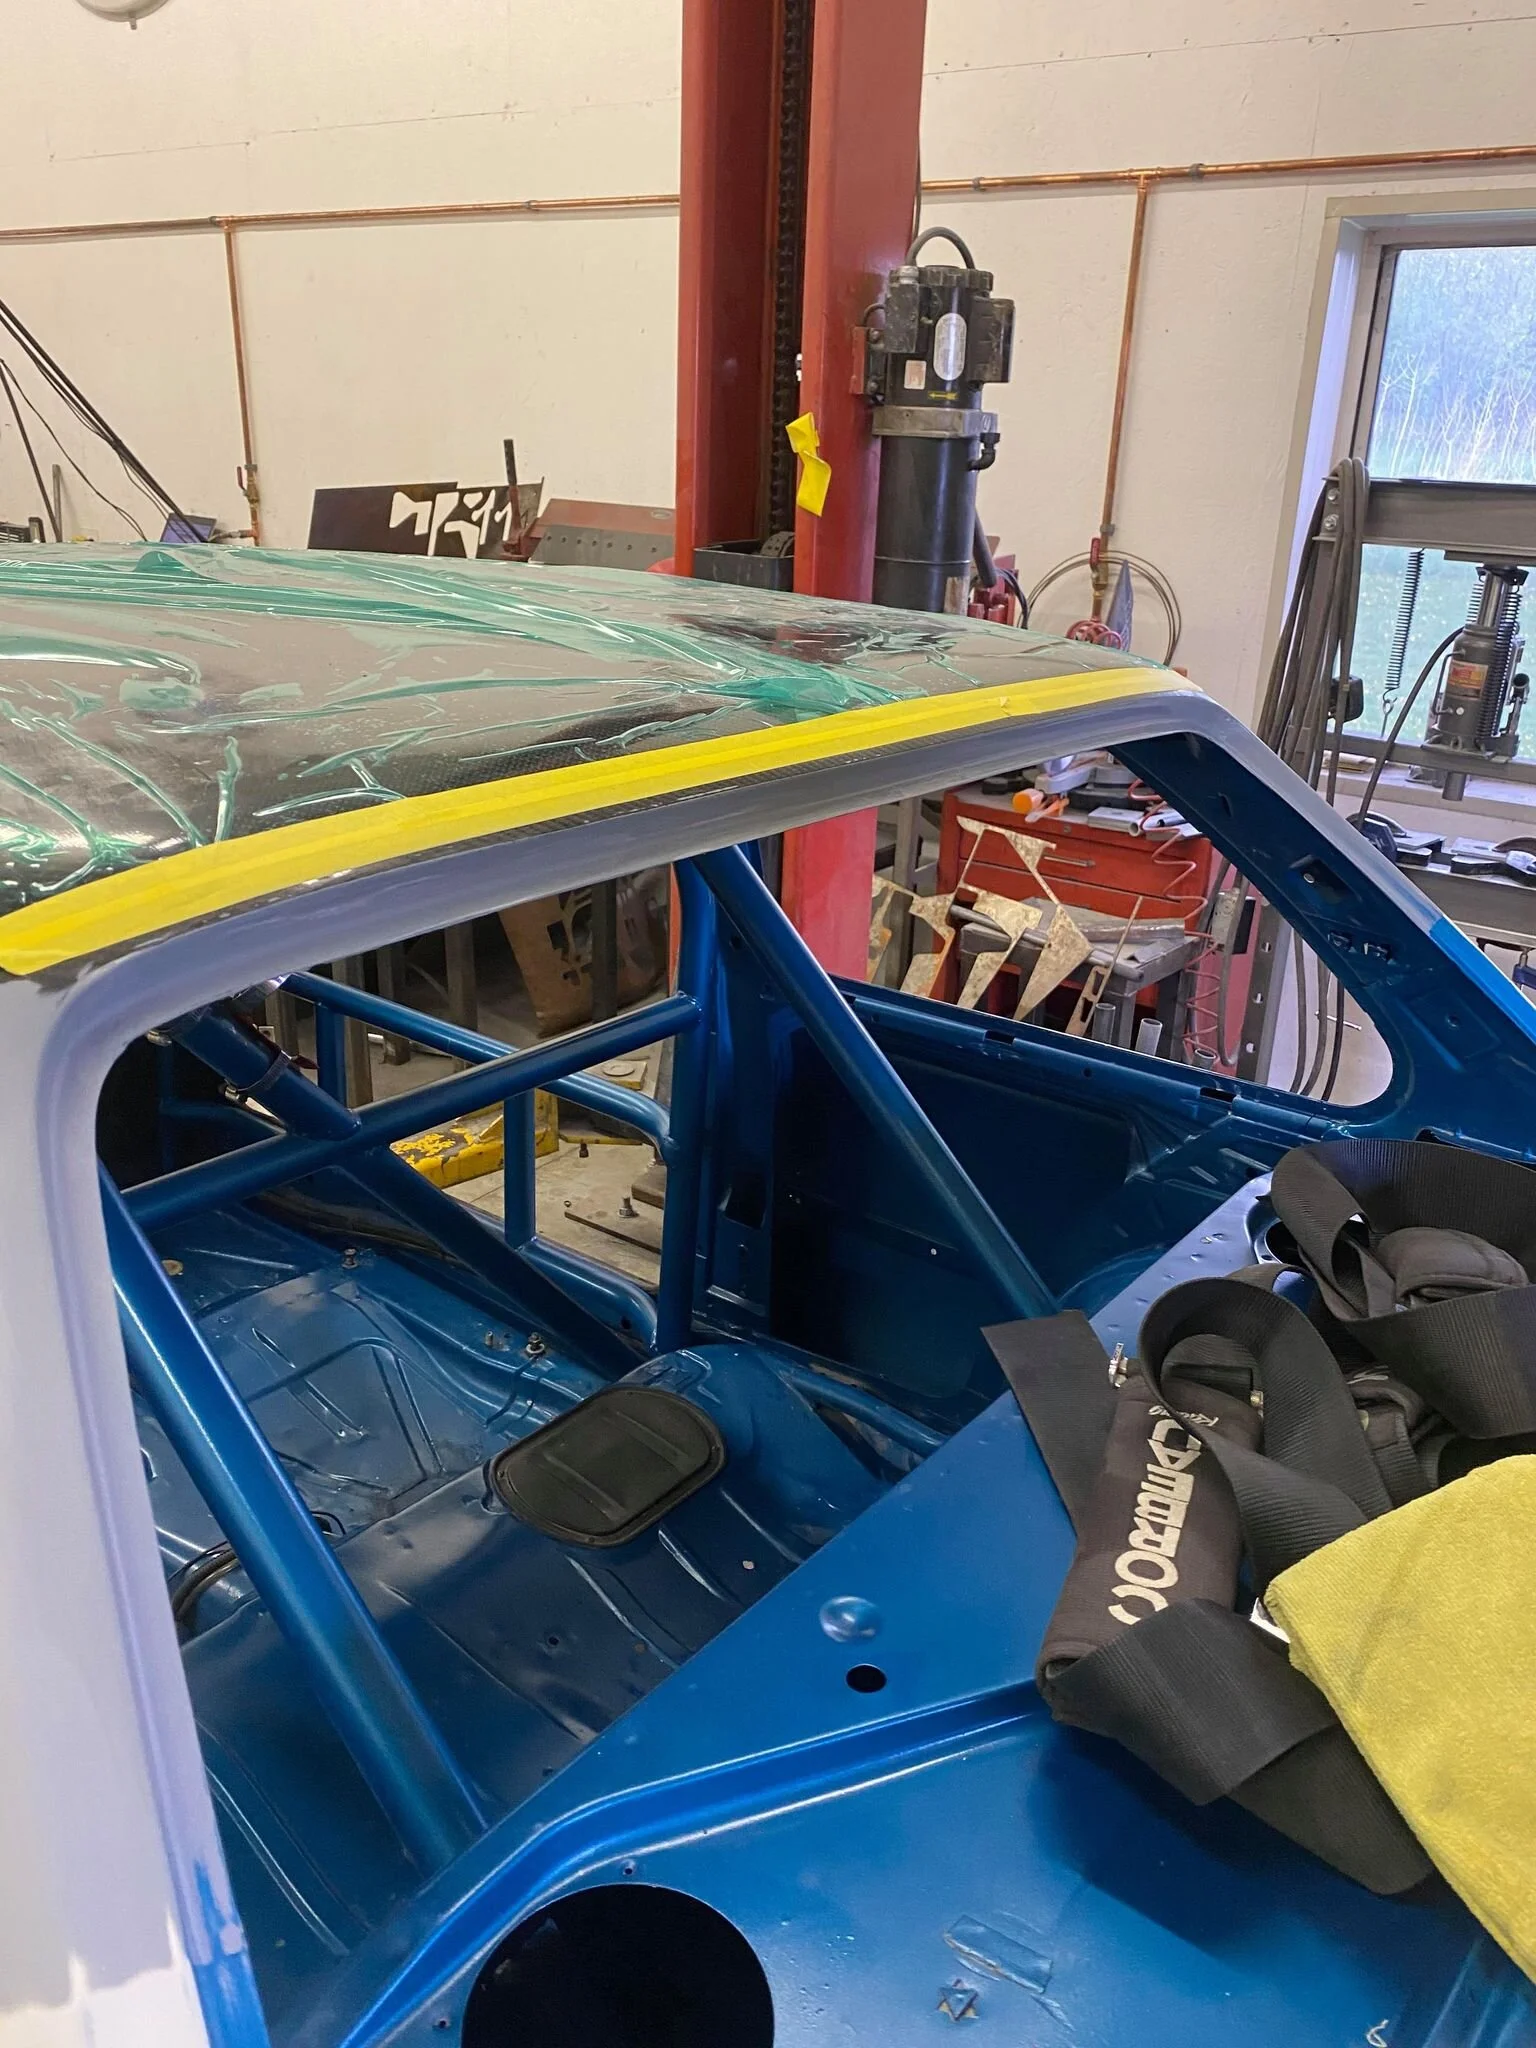
With the skin complete, it was time to prepare the chassis have the skin bonded to it. The roof skin needs 1 & 1/2 inches of the original roof skin to bond to, with the rest of the roof skin removed. Once cut, everything was sanded with 36 grit until bare metal is reached. The overlapping area of the carbon roof skin was also sanded with 36 grit to create a good surface to bond to.
Once everything was prepped, I applied 3M Panel Bond to the bare metal, positioned the roof skin, and clamped down where required. The carbon roof skin fits tight where masking tape can be used to hold the skin down in most places while the panel bond cured overnight. After 24 hours, the carbon roof skin was officially bonded to the car.


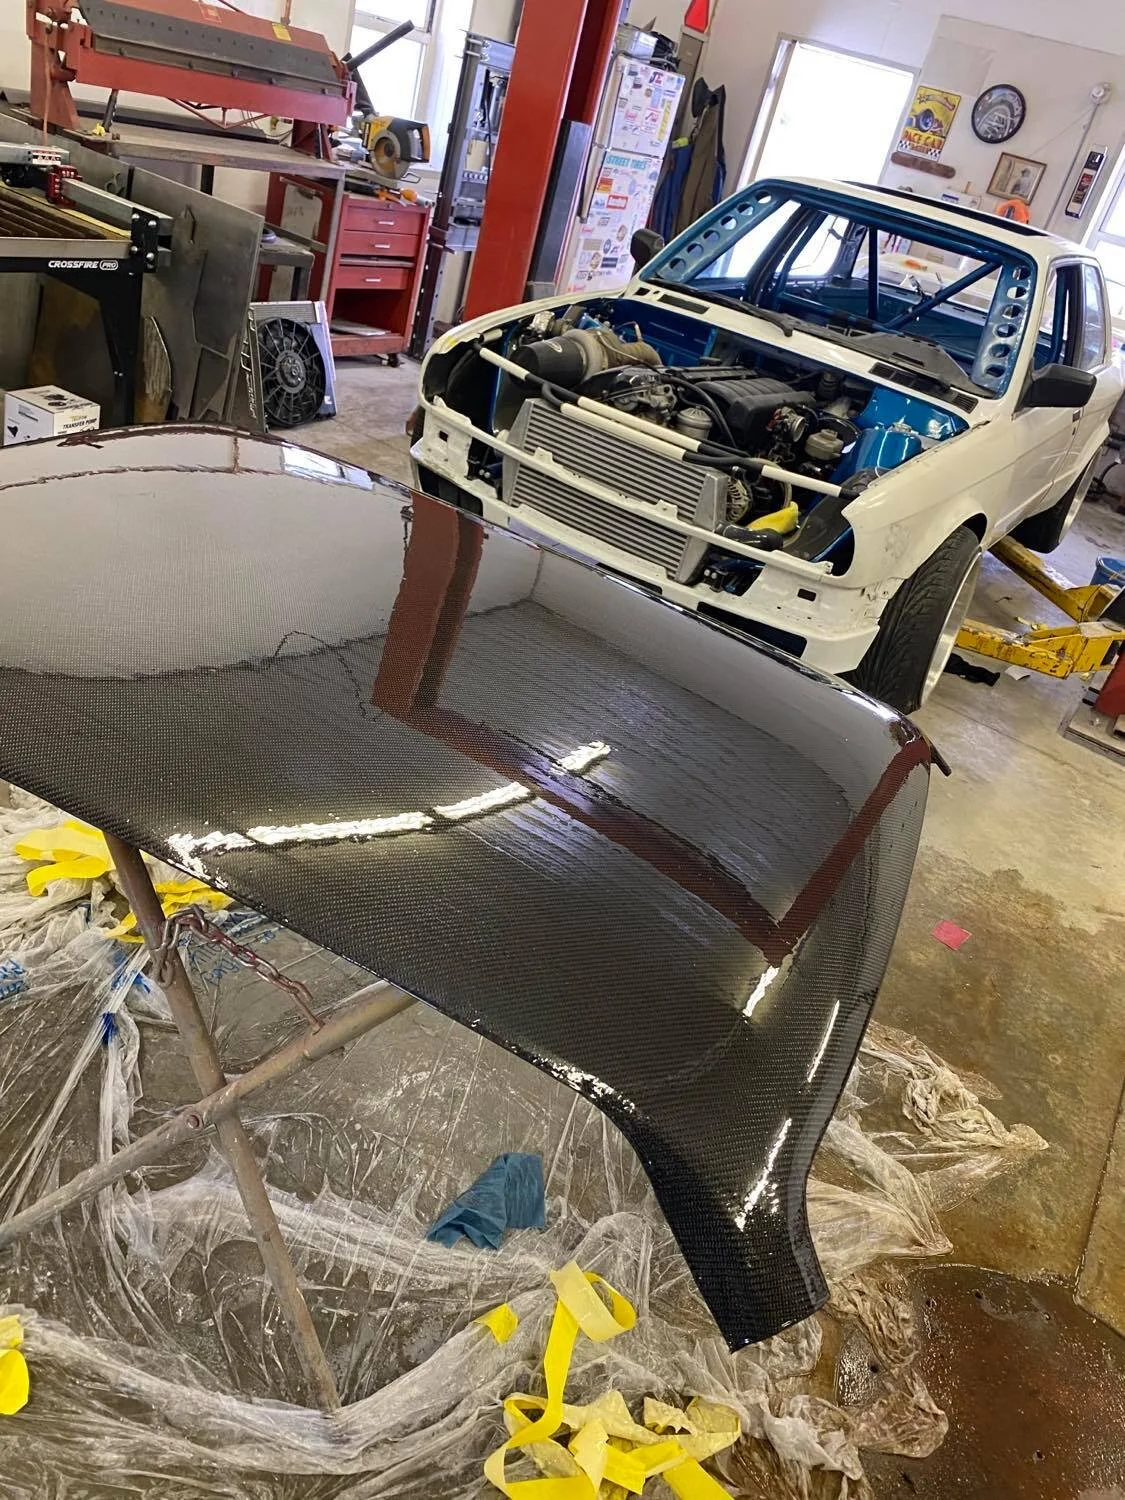
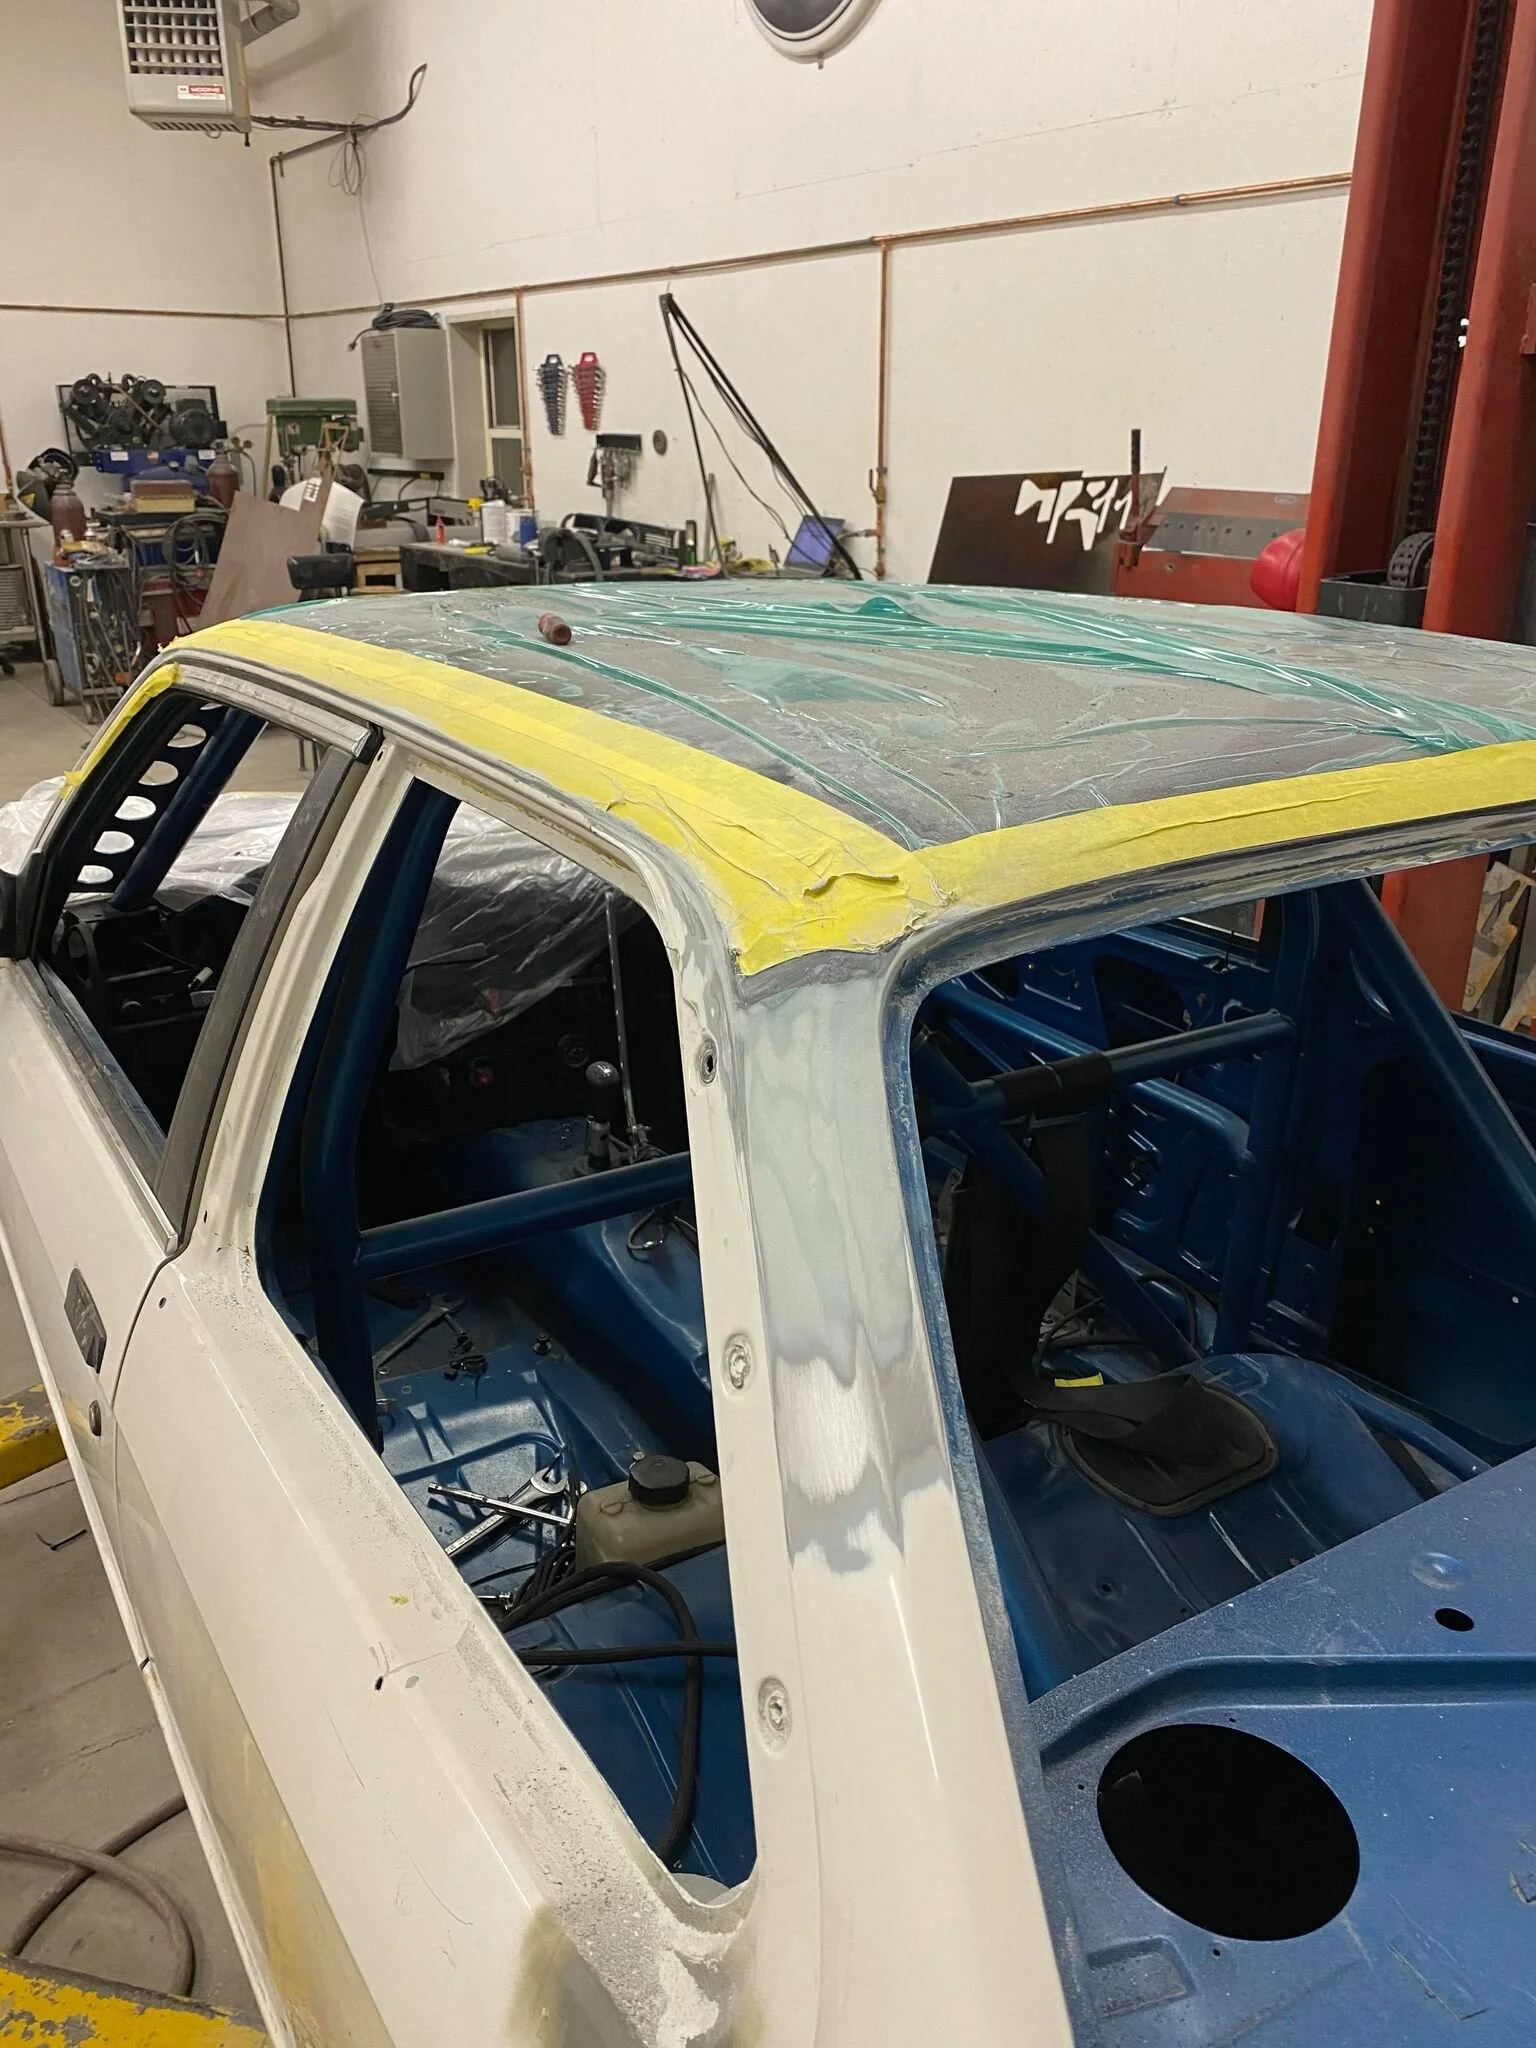
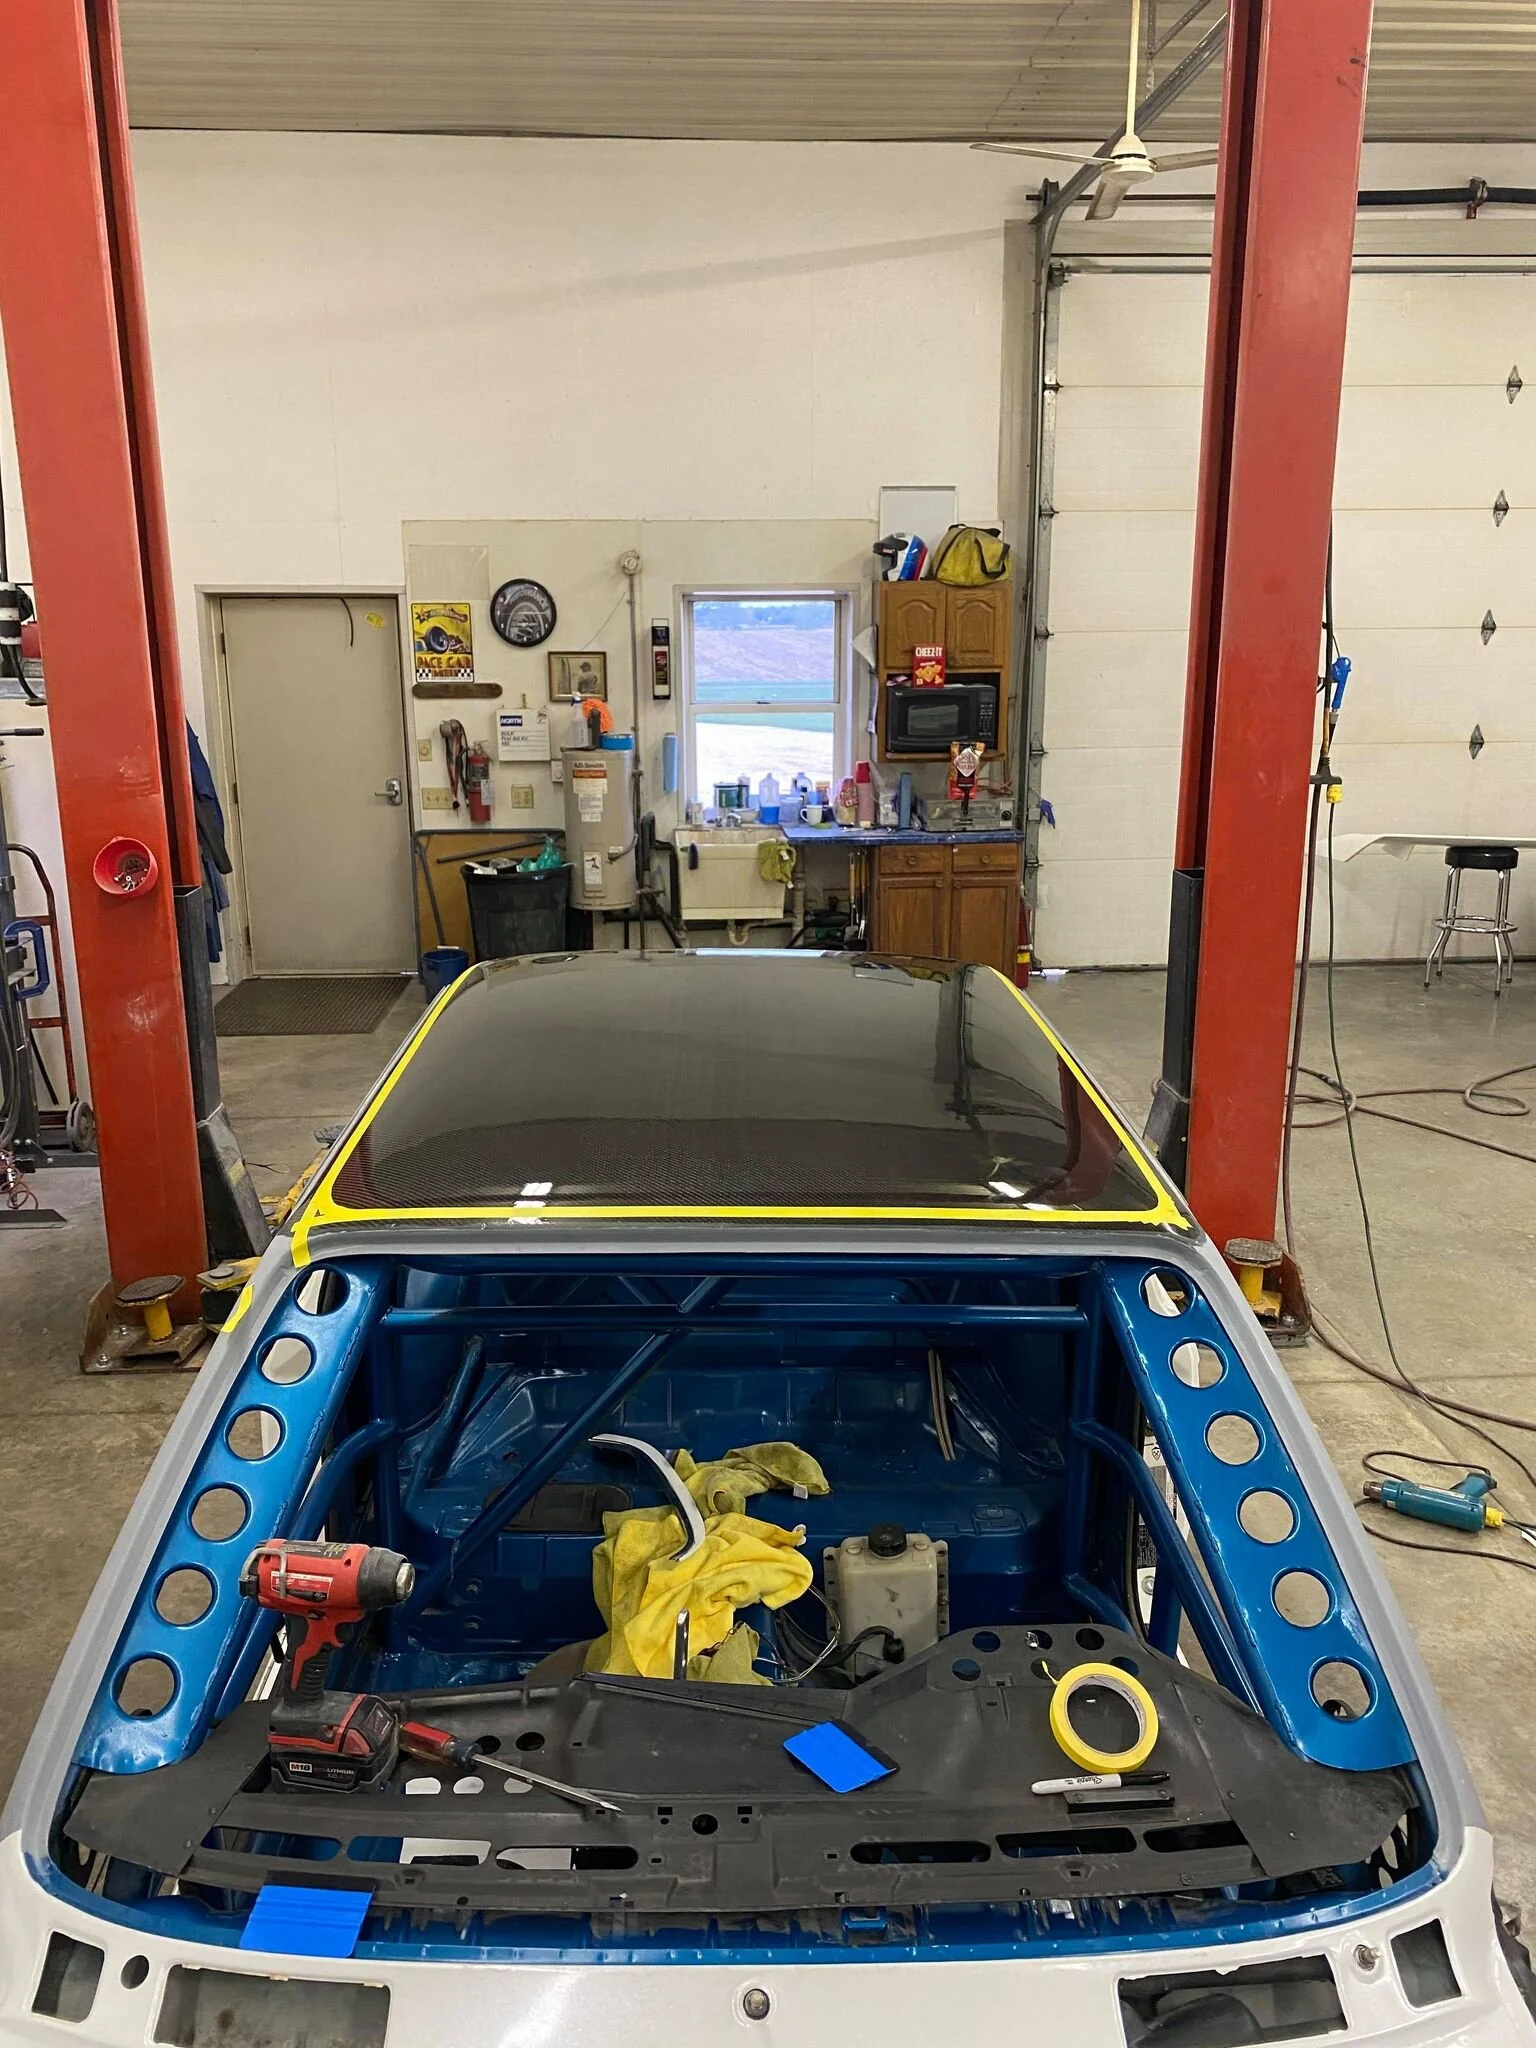
On an E30 there aren’t any parting lines to blend the carbon fiber roof skin into leaving a small ledge. Besides the edge, the carbon roof skin is covered with a protective film and masking to avoid scratching the clear coat while sanding.
Fiberglass Reinforced Body Filler was built up to make this ledge disappear. When the roof was close to being smooth, Body Filler was used to make the carbon roof skin seamless. A coat of High Build Primer was applied to seal up the body filler and bare metal. Just like before, the high build primer was wet sanded to remove and imperfections and texture.


With all of the prep work finished, the protective film was removed and the surface was thoroughly cleaned. To show off the carbon roof skin, but cover up the body work to make the carbon roof skin seamless, I decided to remove the center portion vinyl wrap on the roof.
First, I used masking tape to outline a profile. After a few outline revisions, 3M Knifeless Tape was applied and the masking tape was removed. The vinyl was applied over the knifeless tape, then, the tape was used to cut through the vinyl without scratching the clear coat on the carbon roof skin. At last, the center portion of the vinyl is removed exposing the carbon fiber roof skin.


Looking back, I wish I would have taken more time taking photos and documenting the process better, but I hope this helps and can give someone a few tips and tricks to do build their own. A project like this can get overwhelming at times, but be sure to take a step back and don’t cut corners. In the end, the results are rewarding and worth while.